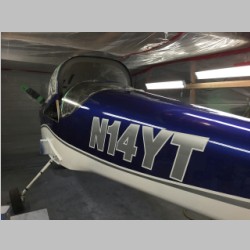
Painting time for N14YT
May 2016This write-up will be updated as the process changes. Usually I prefer to complete a task fully before writing, but at this point in the build, I'm not wasting much time when I'm not working on the plane, so I will write as I have time, and just update it as I go.
Having completed most everything I can get done before moving to the airport, and reaching our warmer months, it is now time to get this thing painted and out of our garage. It's quite a process, to paint an airplane. There is a lot of preparation that goes into the parts, and until you have them primed you never really know if your sanding job was smooth enough, or if you got out all of the pinholes in the fiberglass. So you spend hour after hour, sanding, fairing things in, spraying on a guide coat to inspect your surface, and sanding again. Eventually you come to a stage where you must move on and actually throw down some paint. I would like to say that I corrected every ding, and will have the perfect airplane and paint when all is said and done, but alas, if you want your airplane to fly, you have to get past that anal stage and understand that there will be imperfections. It's a D-I-Y airplane, by definition, built by an amateur. So as I completed some of these parts in preparation for paint, I pictured my currently flying RV-10 and all of it's imperfections, and realized that there were diminishing returns on the investment towards perfection...and it was finally time to call it good enough. Time to throw on the paint and start to use this beast!
For me, part of the pride in building this airplane is being able to say "I did this." From this Man's perspective, I can say it's most comparable to having a baby...in some ways more than you'd first think. When it's first born, it's going to be ugly. Yes, babys are wrinkly, squished up blobs of human with more fat rolls than...well, people from my region in the cheese state. The airplane is an ugly mess of ding'd up metal, pinholed fiberglass fairings, rough body filler, and other war wounds from it's birthing process. But, just as with the baby, you created it. Both the airplane and the baby will become even more beautiful as they are completed. Both of them will give you years of enjoyment, and both of them will end up costing you gobs and gobs of money as they live on. And inevitbly, when you finally have to turn them over to someone else, you'll have to deal with the pain, I suppose. I wasn't willing to hand off the paint to someone else, because it is something that I feel I can accomplish. Building an airplane requires you learn many new skills. We build for "recreation and education" in the amatuer built community...that's the philosophy. Painting is just another skill that needs to be learned, and by learning it, you are adding to your personal capabilities. Not just to maintain and repair your own airplane, but you can use these skills for other repairs on vehicles as well. So with that in mind, I would at least want to be tightly involved in every process of building my airplane.
One other determining aspect of aircraft painting, is the high cost. These days, even a quart of paint is fairly expensive, but when you try to buy that paint applied to a vehicle, the costs go up astronomically. Back in 2006, when I finished my RV-10, the average paint job cost probably $10,000-12,000. I was able to finish mine for somewhere in the neighborhood of $2000-2500. These days I'm hearing that the average paint job cost is more in the $12,000-15,000 range. I was able to purchase all of the paint and other supplies for this paint job for just over $3000, and that was going with fairly expensive paint. That's 4x-5x the price for the labor to put it on the airplane, which just wasn't justifiable for me. I know I can paint something that will look reasonably good, so why hand over a few months of pay for something I can do myself?
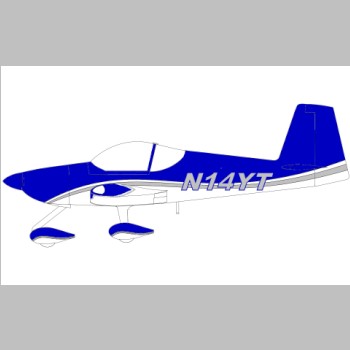
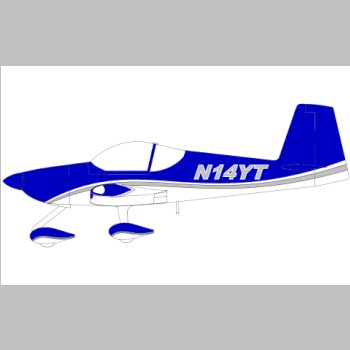
The first task in painting is determining the paint scheme. I'm not much of a fan of 2-color paint jobs, so I automatically went for 3 colors. And in this case, I wanted to have the exact same 3 colors as my RV-10 paint job, because I liked that choice so much. But, I wanted a slightly different scheme. I didn't want to copy anyone else's paint scheme, but as it turned out, Van's factory demonstrators were very good looking and were right along the lines of what I was hoping for. I'm not the biggest fan of their blue and black choice, but I think the silver looks great.
I also wanted to keep a fairly simple scheme, because A) Simple is appealing to me, B) Simple is easier to paint, and C) You'd be surprised how many people I've met who prefer simple schemes...I think resale will be easier if you keep things to standard colors and patterns.
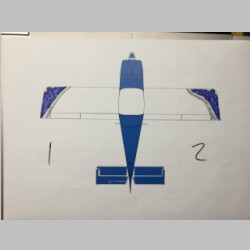
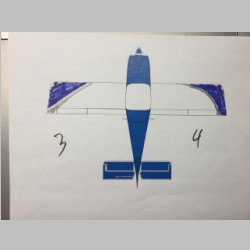
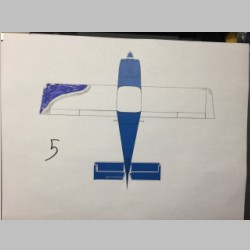
I drew up the below schemes using a paint program. I really was hoping to make it even easier by putting the N-Number in the blue as in the 3rd shot, but I believe I underestimated the letter size when picking the font, and if I sprayed it that wy it would be partly on the curved upper part of the empennage. So most likely when all is said and done, I'll be taping off and painting what's in image number 1. The details will be more apparent once it's time to tape it all up onto the actual fuselage.
For the N-Numbers I really wanted to go with an outline font. It's harder to paint and get right, but looks awesome when done. Also, it's my opinion that the only way to go is 12" n-numbers. You built this plane...you picked the number. Be proud of it and display it for all to see. Not only that, if you plan to travel outside the US borders, you're going to need 12" letters anytime you go, so best to just paint them that way.
My numbers were created by using a vinyl stencil created by a sign shop. It makes the numbering really easy.
 |
 |
 |
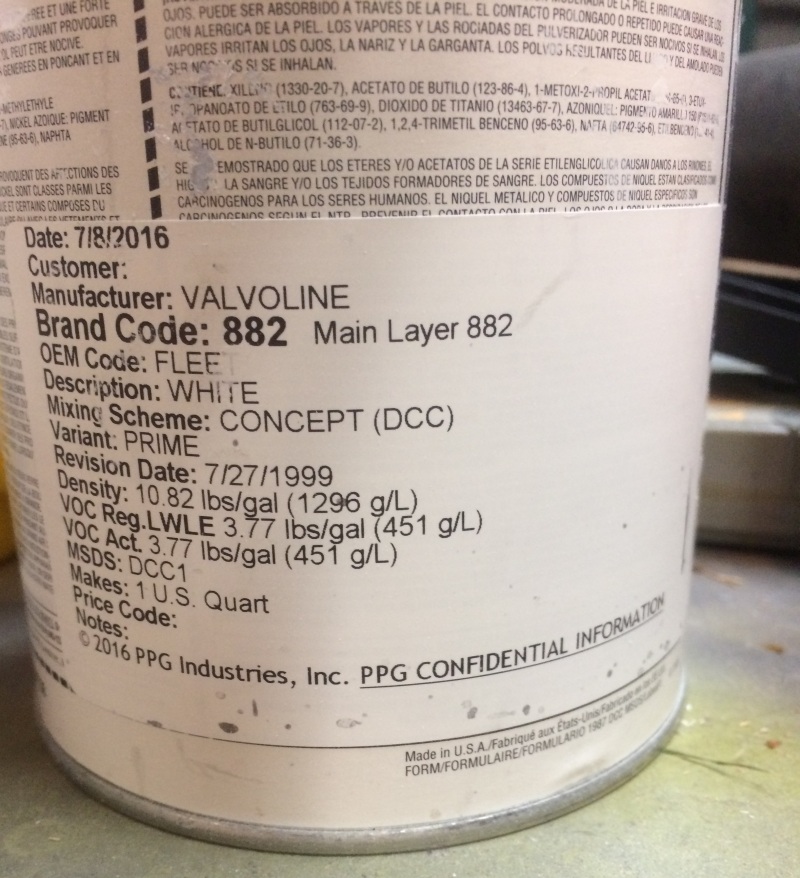
If you've read previous entries in my build log, you've seen that these are my RV-10 paint colors I've used, and that I had intended to use PPG Delfleet paint. That didn't end up being the case, now that I've actually purchased the paint. I did end up going with exactly the same paint as I did for the RV-10. It's held up pretty well, and I was familiar with the application process. But the real kicker was the availability. Doing a paint job on an aluminum airplane with fiberglass parts requires a variety of different paint and primer compositions. Fiberglass parts get primed with an expoxy primer, then overcoated with a high-build sandable primer to fill and smooth any spots. The aluminum gets a chrome etching primer, that chemically etches into and grabs on to the aluminum. (although some say you can also use the epoxy primer) Then both of those sections get covered with a sealing compound to seal them up and prevent bleed through into the paint layer. For the white paint, I'm using single stage again, for ease of application and potential repair. For the blue and silver I decided, against my own previous comments, to go with a base/clear combination. This was mainly driven by the fact that I was doing it myself. It's harder to get the metallics in paint to look smooth, with single stage paint. And me being an amateur, I figured I'd stick with the very simple application of the base coat with metallic. The clear is also very simple, and it looks great when done. So there are a variety of products you get, and in the Delfleet line, things like the etching primer weren't a stocked item. Had I been able to get everything, I may have gone that route, as the paint price is approx. $400/gal for the PPG concept I'm using, vs $250/gal for the Delfleet. But when you need more paint, you don't want to wait for it to be ordered.
| These are the paint
cards from my RV-10 paints, that I also used for the
RV-14. (For the interior on the RV-14 I used Delfleet, color matched to the grey) |
|||||
 |
 |
 |
 |
 |
 |
| For the white it's a very common white used by many manufacturers...including Valvoline. | |||||
 |
|||||
For more on the specific paint, here is a listing along with data sheets, of the items I used:
- PPG ShopLine JX101 Wax and Grease Remover
- DX1791 / DX1792 Self Etching Wash Primer
- DP48LF Epoxy Primer / DP401LF Catalyst
- K36 Primer Surfacer / K201 Catalyst / DT870 reducer
- DAS3021 White V-SEAL Acrylic Urethane Sealer / DCX3030 Hardener / DT870 reducer
- PPG Concept DCC Acrylic Urethane Paint / DCX61 Hardner / DT870 reducer (Single Stage)
- PPG Deltron 2000 DBC Basecoat / DT870 reducer
- Deltron DCU2042 Speed Clear / DCX61 Hardner / DT870 reducer
|
Final Materials Recap
6/2016 This is a follow-up to the materials listed above, to let you know how much material I used. The price listed did climb just a little bit, due to my poor planning (from lack of experience). PPG JX101 Wax and Grease Remover: 2 Gallons worked out well for the project DX1791 / DX1792 Etching wash Primer: 1 Gallon of each was probably double what is required. After finishing the project, I think if I were doing it again, I would skip this step completely and instead buy more of the DP48LF Epoxy primer and catalyst to use as the base primer. I think the adhesion would still be great, and that may possibly prevent you from having to use the sealer, which is used to seal over the etch primer. DP48LF Epoxy Primer / DP401LF Catalyst: 1 Quart. This was used over the fiberglass parts as the first layer of primer. I don't remember needing a 2nd quart, as there really aren't that many fiberglass areas on the plane. If you use this primer for the aluminum, you will probably need 1 gallon total or maybe an additional quart or so. Note: the quantity listed is for the Primer. The DP401LF just buy the amount needed to match the number of quarts of primer. K36 Primer Surfacer / K201 Catalyst: 2 Quarts. This was also only used on the fiberglass parts. I maybe could have gotten by with only 1 quart, but with the pinhole filling I needed more. This is a thick high-build primer so it sprays out pretty fast. 2 Quarts may be a good plan. Note: the quantity listed is for the Primer. The K201 just buy the amount needed to match the number of quarts of primer. DAS3021 White V-SEAL Sealer / DCX3030 Hardener: 1 Gallon + 1 Qt. This I used on the aluminum areas of the plane, and I think you may be able to eliminate it if you used Epoxy Primer...although this stuff does flow and spray very very nicely. I bought 1 gallon of white and 1 quart of a dark charcoal. In the end, I'm guessing I have at least a quart left, so it is likely that if you use etch primer + sealer you can get by with a gallon. It only requires 1 coat to seal. I would go with the white if you do a white paint over it, or grey if not. Having a slightly contrasting color makes it easier to see where paint needs to be thicker at that stage. Note: I may be mis-remembering on the DCX3030...something tells me I needed 2 quarts, to mix 1 gallon. PPG Concept DCC Acrylic Urethane Paint: 2 Gallons. This was used for my white. 2 Gallons was about right. I think I still have enough left to do the wheel fairings. If not, I'll have to buy another quart. Deltron DBC Base Coat Paint: 3 Qts Blue + 1 Qt Silver. This is the most expensive of the chemicals you buy. The DCC white was a bit over $420/gal. The Blue was $175/Qt. Had I known I'd use 3 Qts I think it would have been cheaper to buy 1 Gallon of Blue. I wish I'd have done that. 1Qt of Silver was about right. So when you see my plane, if you intend on that much of the color, then consider a gallon...or at least price it out as multiple Qts vs 1 Gallon and see what the difference is. The blue, at $175/Qt without tax is about $700/gal. (ouch) Deltron DCU2042 Speed Clear: 1 Gallon + 1 Qts. This one hurt a bit because I over-mixed a few times, and wasted some clear. This caused me to accidentally open my separate quart. It's not super cheap stuff...but I could have done it in 1 Gallon, I think, if I'd have been careful. But make sure you have extra on hand because if you run out it's a pain. I purchased 6 total quarts worth, and returned one unused quart. DCX61 Hardener: Unknown...maybe 4-6 Qts. You will want to buy enough for all the paint you purchase. I don't remember the exact quantity you use, but I know you mix it with the DCC White, and the Clear. I'm thinking I bought 4-5 qts for the total job. I don't know if it's available in the gallon...if so it may save money that way getting 1 gallon and then additional quarts. One complication is, the cap glues itself on with this stuff, so clean the spout each time if you use a gallon or you may have a hard time getting it open later. DT870 Reducer: Unknown...maybe 8-10 qts. I'm probably over-estimating here, but it's cheaper. If you buy by the quart it's probably in the $30's per quart. By the gallon it's in the 70's. So you're absolutely better off buying in gallons. You will use at least 2 gallons, I'm sure. What happened to me in re-spraying the wings, is that I ended up needing some DT885 also, for higher temp days. So this all depends on the weather you plan to spray in. You may need DT870, and DT885, or even other. My suggestion is to plan on the WX but then buy some other that will help you if you think it may fall either above or below the temp range you expect. Like I wish I'd have bought 1 gallon of DT885 and 2 gallons of DT870. You can mix them to be in between, and if it's too hot, you can add extra DT870 to thin it rather than use DT885...so it's versatile. Just buy more than you need by a gallon or two, and consider your temperatures. One thing that is kind of handy is buying 1 quart bottle also...it's easier to pour out from the quart bottle as you mix. I used a funnel to keep refilling my quart bottle from the gallons. So that's a recap of the paint materials. Additionally, make sure to have some GOOD QUALITY paint mixing sticks on hand. They had some cheap ones that flaked wood particles, or some sanded and rounded ones that did not. Also leave with maybe 30-50 filter funnels (free usually), and I highly recommend buying a 50 or 100 pack of the paint mixing cups on Amazon. Then get some small ones from the paint shop because you'll want a dozen or so of those too. For respirators, the full face one worked out very very well for us. I probably went through 10 pairs of filters and prefilters for those, or more. If you have fresh cartridges you won't smell a thing. If you smell anything, stop what you're doing and replace them right away. All these cartridges and mask items I got from Amazon, so it only takes a couple days to refresh your supplies. Plastic: I needed 2 rolls...I can't remember how long they were...at least 100' each. The larger of the 2 sizes. Inline air filters: You probably want to not only have a nice regulator/filter, but throw in the disposable inline filters as well. My Harbor Freight ones broke easily. The ones from the paint shop didn't. I went through about 4 or 6 of them. That should get you started! |
That about covers the actual paint and chemicals.
For my spray gun, I use 2 guns. One is a Sata Minijet...not even sure of the exact model, that I use for smaller parts. The other is a nice Satajet RP Digital 2 with a 1.4 tip...similar to the Satajet 2000 RP model. This gun is probably better suited for home use than the newer guns are. It requires approximately 12cfm at 35psi supply, but you spray at 24-27psi at the gun. It has a built-in digital display and regulator on the gun handle. The newer guns use fewer turns for the fluid knob. Mine is 5-turns to full open flow, and you almost always run it at fill wide-open fan. You spray at a distance of maybe 6-8". This gun lays down the paint pretty quickly, so you have to keep your arm moving all the time.
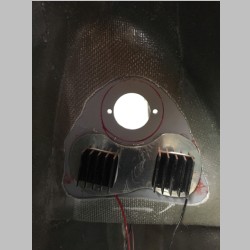
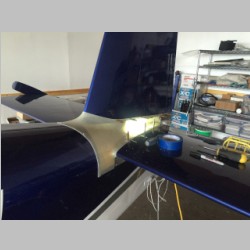
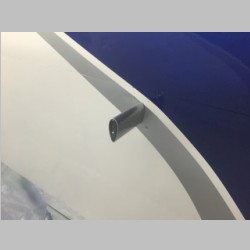
Below I have a couple of things to mention. The first 2 photos are just pics of my wingtip nav lights, after cutting the holes in the wingtip for them. I'm glad I went this route. I think my brightness may be overkill though. They are darn bright!
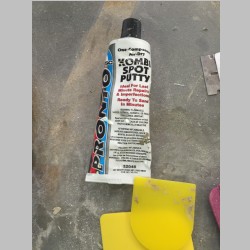
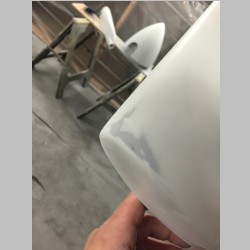
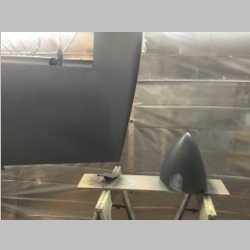
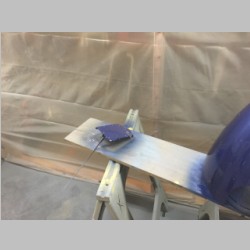
That 3rd pic is some spot putty I used for filling pinholes. It was INCREDIBLE stuff!! I was able to fill all of the pinholes in the spinner in about 15 minutes, and after another 15 minutes of sanding the spinner was ready for priming. Amazing stuff.
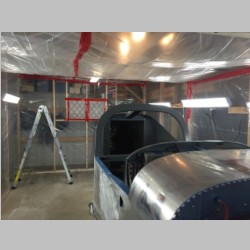
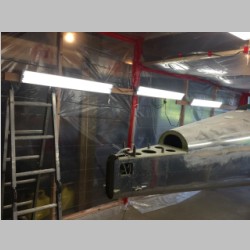
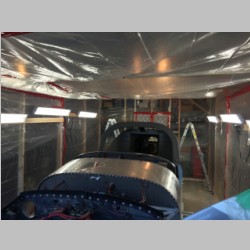
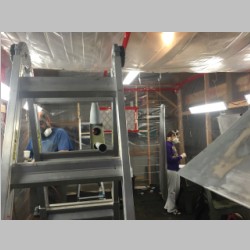
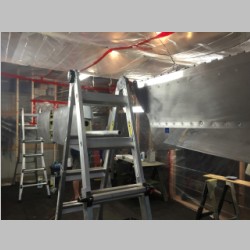
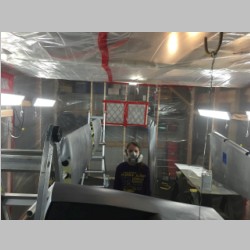
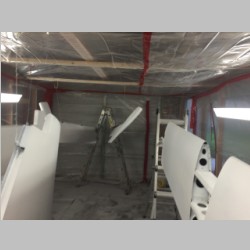
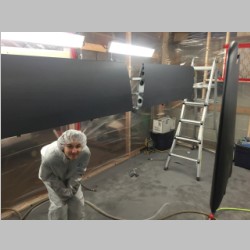
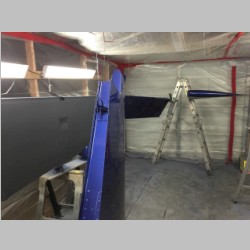
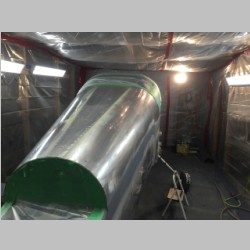
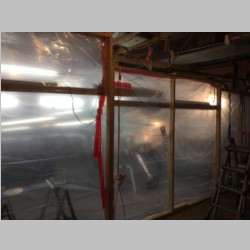
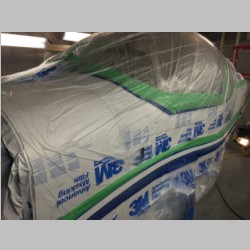
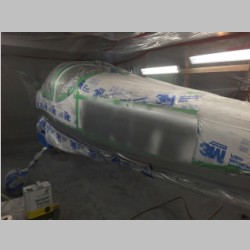
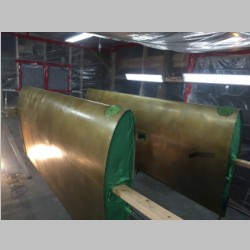
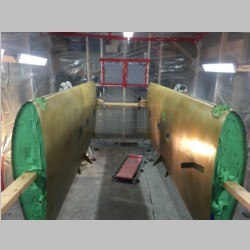
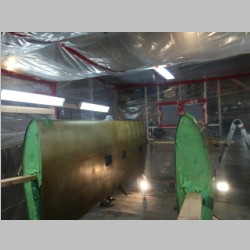
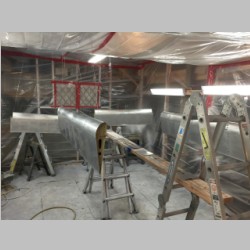
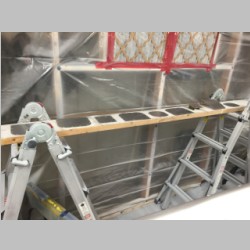
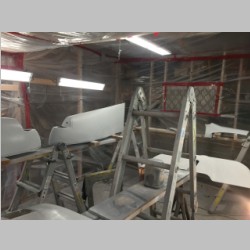
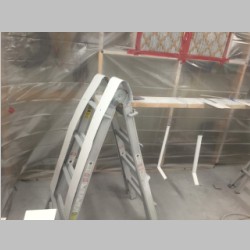
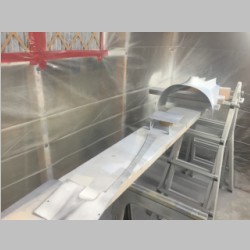
In this first set of photos we aren't actually going to start by painting the fuselage. For about $350 in materials, I was able to build a 12' x 22' paint booth in one of my garage stalls. It would have been even easier if I had a smaller garage with high ceilings, but I built an entire walled frame and put plastic on the inside of it. Then with 2 pusher fans on the inlet filters, it keeps the room positively pressurized. 2 exhaust filters trap all the paint overspray as it leaves. I wanted a positive pressure booth because otherwise when you open the door, dust gets sucked in, and this also allowed me to build the booth out of wood (easier than PVC, and easier to re-sell when you're done), without getting wood dust inside. It ended up being very air tight, and will work amazingly well! Roofing paper on the floor protects the garage floor.
 |
 |
 |
 |
 |
 |
 |
 |
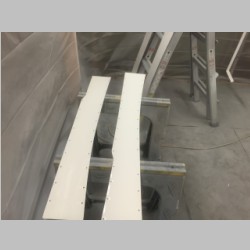
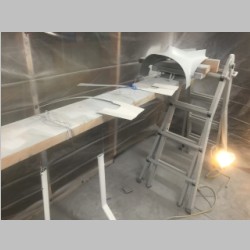
With a variety of ladders, and hangers screwed into the ceiling, we suspended most of the small parts in preparation for painting. Day one we just primed the fiberglass tips on everything. I got us both full face respirators to use for the larger painting portion of the job. These pics mainly just show the booth. |
|||
 |
 |
 |
 |
 |
 |
 |
 |
 |
 |
 |
|
To quote a popular phrase seen in the movies these days, "This S**t just got real!"
I learned a couple more things along the way to finishing this batch of parts. #1 is that while for many years the only real way to paint aluminum successfully was to use an etching primer, apparently now the adhesion is good enough with epoxy primers that those can be a suitable aluminum primer too. A pro shop that is currently doing a friends plane used Epoxy primer rather than etching primer. My guess is that while the adhesion may not be 100%, because it's non-etching, it's probably so close now that it's negligible in difference....but that they are probably doing it not because it's the best adhesion but for 2 other reasons. 1) Chrome etch is fairly nasty stuff. Eliminating this will eliminate one more chemical that has to be dealt with. And 2) by eliminating etching primer and using epoxy on everything, you can more quickly get to painting each piece. In my case, on fiberglass sections, I used Epoxy Primer, High-Build primer, Sealer, then either the single-stage or base-clear paint. And, on Aluminum I used Etching primer, Sealer, then the paints. The aluminum doesn't really need the high-build stuff. So, by going the other route, I could have spent more on epoxy, but eliminated the DX1791 and DX1792 from the mix, and saved a bit of time. When I paint my next plane, I think I'll go that route. It may even save a slight bit of cost.
 |
 |
 |
 |
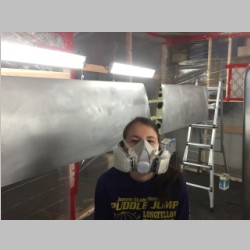
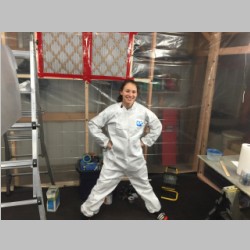
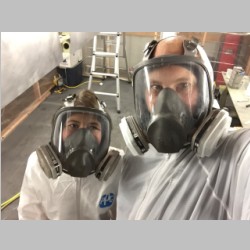
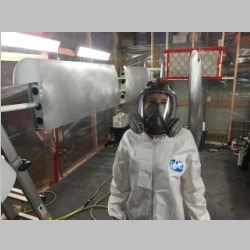
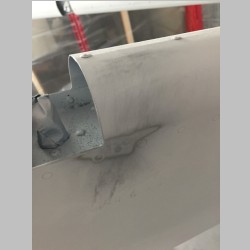
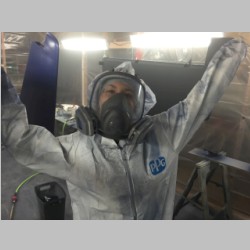
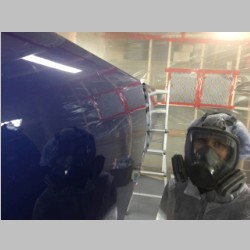
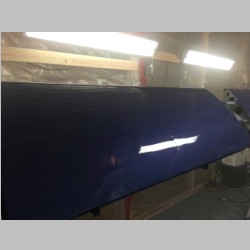
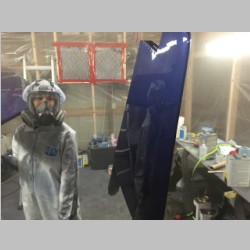
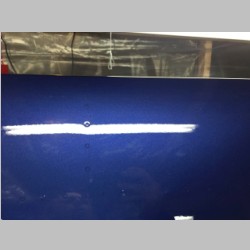
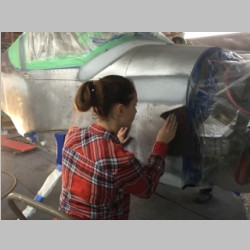
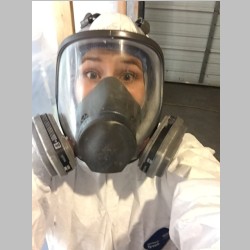
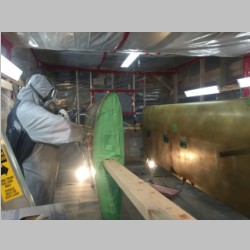
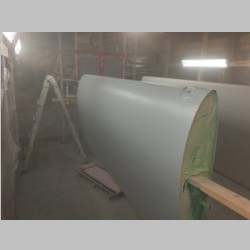
In this section you can see a few things. First, our full-face respirators. While when painting my RV-10 I got by with a half-mask, these full face respirators were plenty affordable, much more protective, and very comfortable. Eyes can absorb a lot of solvents, too, so protecting the eyes better is important. These things worked real well for us. The masks are 3M 7162 models, with Organic Vapor cartridges (3M 6001). The mask I got myself was approx $135 on Amazon and came with the prefilters and cartridges. My daughter got the 6700 model which looks identical, but didn't come with any cartridges. It was the only way you can buy small or medium size, apparently. We had to grab prefilter retainers from one of our other respirators (3M 501 / N95 Prefilter Retainer), and buy the P95 prefilters separately (3M 5P71PB1 10-pack). The paint suit I got at the local shop. It's a nice lightweight nylon. I couldn't get one of those in Medium for the girl, so she had to live with a tyvek suit without hood. The first day she ended up with frosty hair so the 2nd day we got a hair bonnet. Being delivered soon I was able to get on Amazon, a Tyvek suit with hood for about $13 for her. That should be even better, but she'll still want the hair bonnet...my hair got a little dusted even with the hood. I also learned that before you start the project, stock up on 2 things. 1) get tons of paint filters. They are usually free when you buy the paint. And 2) get a good sized pile of mixing cups. I had bought a dozen or so with the paint. They were about $.64 each. Not a bad deal. But I was trying to clean and re-use them and that is a mess and a waste of lacquer thinner to clean them out. Usually I'd prefer to NOT dispose plastic randomly, but in the process of this paint job I think it's the best way. I bought a 100 pack of 32 oz mixing cups on amazon for $36.59...they are nearly identical to the ones the paint store sells, and have all the mixing ratios labeled on the side. By buying 100, I won't be tempted to contaminate paint and re-use them...and they'll be useful for many other things in years to come. I also ordered a wash bottle...the squeeze bottle with bent stem like you use in science class, to hold the lacquer thinner. It's much more handy than pouring it out all the time. So a few small purchases made things much nicer. It took me a full session to get thru the epoxy and high-build primers on the fiberglass tips. That's one of the reasons I'd suggest using epoxy primer. If I had, I could have sprayed all of the parts and had them all protected. Once you scuff and scotchbrite the aluminum, you should coat it very soon. It oxidizes very quickly. FOR SURE if you go 8 hours, you need to re-scuff. (Tip: Buy a whole box of red scotchbrite pads) Since I could only spray the epoxy on the tips and then the high-build, I had to re-scuff the aluminum the next day. The High build has a 1-4 hour drying time, depending on reduction. I reduced it so it was 1-2 required, but our temps were cold that day so I left it overnight, and then sanded it the next day. The next day we sprayed on the etch primer, and then the sealer on everything. I was very happy with the finish it gave, once sealed. The paint shop dude highly recommended this sealer, and it worked great. But, I did apply it slightly thin in some places. This being the first large area spraying I've done for a long time, I got it too thick and had a few runs right next to the hinge points on the elevators, and on one elevator horn. So the next day I hit the runs with a sander. 2 rows below you can see those sanded areas. |
|||
 |
 |
 |
 |
 |
 |
 |
 |
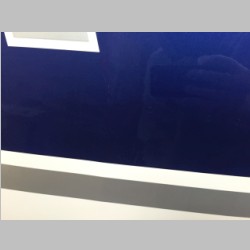
That night I was pondering the coverage aspect a bit more...knowing that my first sealer coat was a little light. If you notice the first photo below, you can see the aluminum sheet labeling thru the sealer. It's pretty thin. I knew I could just spray it thicker, but started thinking that if all of these pieces were going to be blue, I may as well use darker sealer. Not that it really matters, but it can help hide thin areas. So I bought a quart of dark grey sealer to use for the 2nd coat on these parts (normally only 1 wet coat required). The left over dark grey, I'll mix with the white sealer. I figured even when I spray white, it will help me know my coverage is good if I have a little grey to the sealer. (but that would FORCE me to have good coverage on the white, which I want. I want a thick white single stage coat. The etch primer dries VERY quickly and so does the sealer, so before we started the base/clear color the next day, I scotchbrited the sealer (I didn't have to until 72 hours but did anyway just to be safe) and then spot sprayed the etch on the bared spots. Then we filled the gun with the new dark grey sealer and went to down. It instantly covered the white sealer, so I knew I had a good coat on. Man that stuff looked good when I got done! No runs at all, too, on this coat. |
|||
 |
 |
 |
 |
 |
 |
 |
 |
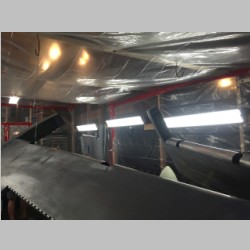
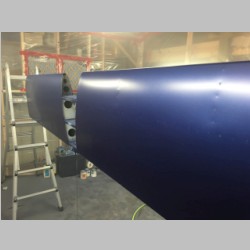
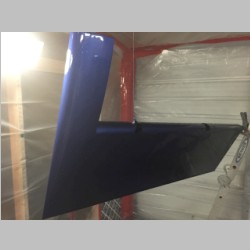
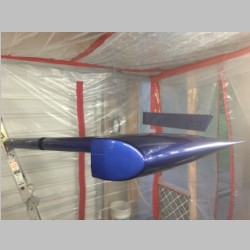
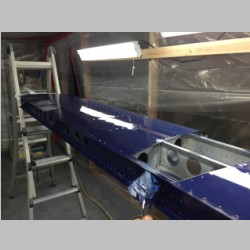
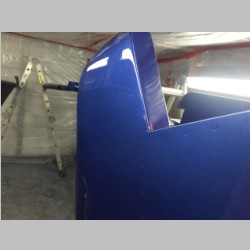
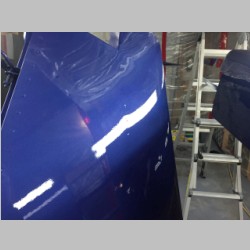
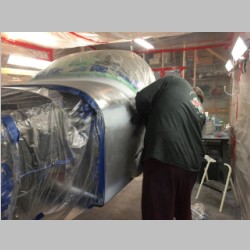
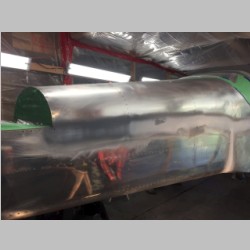
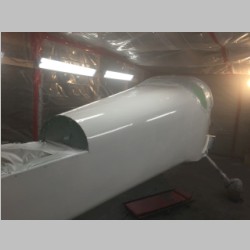
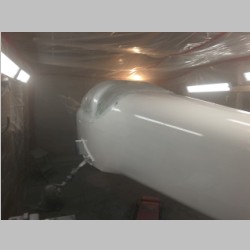
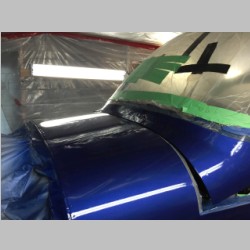
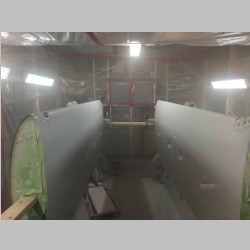
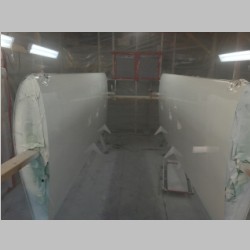
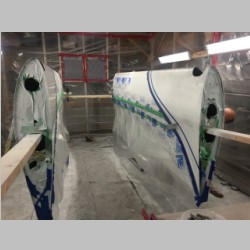
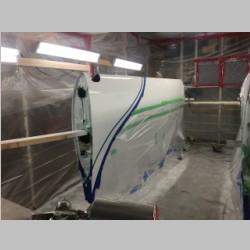
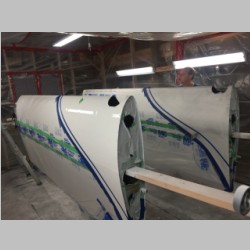
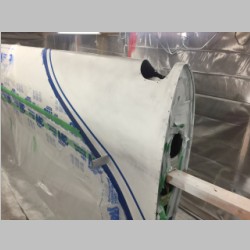
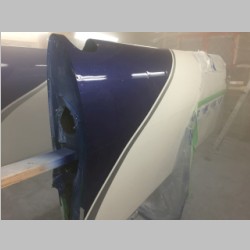
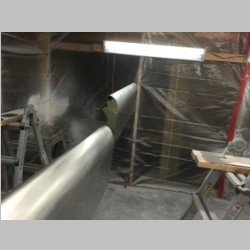
This is where it got real fun! When painting the RV-10, the guy that helped was a pro. He sprayed the entire fuselage and most of the wings. So he probably sprayed 75% of the paint that we did. I did all of the base/clear stuff though. (Hint: Watch youtube videos on painting...see how dang fast those guys move. Then imitate that.) So anyway, this being 100% me, and knowing I was always prone to putting down too much paint, I was praying for a good finish. We cleaned the gun and loaded up the Daytona Blue. It's a 1:1 mix. The paint shop told me there was no shelf life on paint, and I had a 1/3qt remaining from the RV-10, so I mixed it right in with the fresh. Now they share the same DNA. The color covered the dark grey sealer instantly and looked beautiful. I had remembered it being dull...and it was, but it still had some shine to it. 2 coats of base and it looked real good to us. We were cheering, it was so sweet! Then it was time to slam down 2 coats of clear. The clear is so thick, I'm sure you end up with a heavier airplane when you go Base/Clear, but it does look very very pretty! I go with white single stage to save a little weight and simplify repairs a bit. A friend of mine on the West coast recently told me that he clear coated his entire plane and his pre-to-post painting weight difference was between 80-90lbs, whereas for a basic single stage job you are probably looking at around 40lbs. (Sidetrack: Repairs - In planning this paint job, one thing I definitely wanted was simple yet nice. I learned a hard lesson on the RV-10. I have some damaged paint on my wingtip, but my wingtip is 3 colors. I also damaged my rudder a little in a windstorm. This is also 3 colors. In fact, when you count it up, to repaint those areas you would need to buy at least 2 pints of base (1 per color), a quart of clear, and a quart of white...not to mention if you sand thru you may even need primers. This stuff is PRICEY stuff. A quart of blue in my case, is around $185. When my RV-10 rudder got damaged, I bought all the parts and have them on hand to build a new rudder. I can't remember the cost...at least $250..maybe $400 to rebuild the rudder. But, by the time you buy paint, you will probably add at least $350-500 in paint alone due to the 3 colors. So this paint job I'm going to TRY to come up with a way to only have one color on my wingtip. On the rudder, there simply is no way I can do 1 color...or even 2 probably. But I did make my horizontal and vertical stabilizers, and elevators all single-color, and the same will be true hopefully for my flaps. For the ailerons, I am planning single color too...but that may force me to put 3 colors on the wing tips. We'll see. Anyway, consider repair cost when looking at what you intend to do, because paint is not cheap at all.) Back on track... The clear is truly a joy to spray. I was very happy with the lighting in MOST of the booth. The one end really needs an 8th shop light in it though. That makes it tougher. I threw down a nice wet coat of clear and the parts just exploded with gloss! It wasn't long and we were done with the first coat, and immediately mixed up and started the 2nd coat. Somehow, be it overspray, or from when I sprayed the opposite side of the horizontal stab, the first coat had a speckled texture to it, and I wasn't happy. It wasn't that way when I sprayed that section, but must have gotten hit by airflow from the gun when I did the opposite side. But, I was relieved when the 2nd coat completely rid the part of any of that defect! This stuff just flows REAL well and makes things nice and smooth. No, even your baby's butt isn't nearly as smooth as this gloss! Towards the end of the 2nd coat, I saw a drip start to run down the elevtor horn. I quickly wiped it with my fingertip, causing a long streaking gouge. But not to worry...easily fixed. I hit the spray and filled it in nicely there, then flipped the elevator horizontal and it all just flowed into the gouge and healed it right over. Clear is really amazing stuff. It would be tempting to clear the entire plane, but I'd probably pay a 20lb or more weight penalty if I did...it's really thick stuff! |
|||
 |
 |
 |
 |
 |
 |
 |
 |
 |
 |
 |
 |
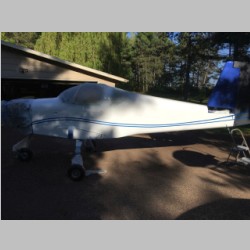
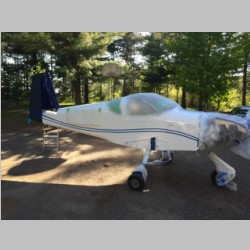
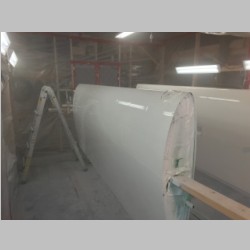
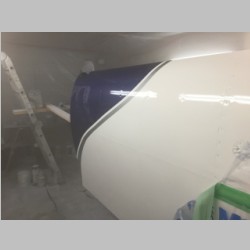
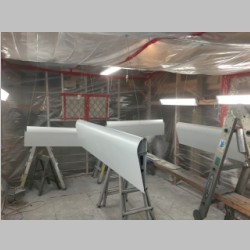
So with that clear all applied, we did a thorough gun cleaning and walked out of that flypaper feeling sticky floor to let it all dry. An hour later I could touch the parts and they were just soooo smooth! The next a.m. they were ready to remove. These parts can go straight to the airport! (except for the Vertical stab, which is needed so we can lay out the paint stripe pattern on the yet unpainted rudder. |
|||
 |
 |
 |
|
Sideline jobs
 |
 |
 |
 |
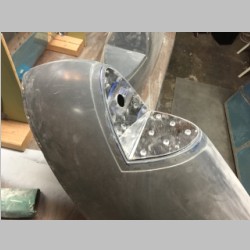
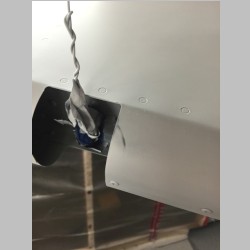
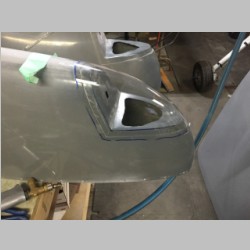
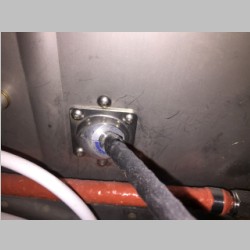
Recently there became a new service bulletin on basically all RV's to check for spar cracking or inboard aileron hinge bracket cracking. The RV-10 and RV-14 are harder to inspect with their flap gap seals. But, builders are having good luck with the above articulating head endoscope camera, so I picked one up. It looks like it should also work well for valve and cylinder inspections. Had some cold weather interrupt the painting, so spent the day fitting my wingtip lenses. It's pretty easy...go slow and use a file a little at a time. You can cut them with a giant metal snips. With my quadrant install, I've had a couple people ask me where I located the eyeball passthrough and which one I bought. I used the same eyeball for my lightspeed ignition wires, since the box is mounted in the cabin. The location of the hole is as follows (3rd picture above) The CENTER of the eyeball when punching the hole in the firewall is located 2.5" up from the bottom of the top section firewall panel....so it's on the upper. The LEFT edge of the square eyeball bracket is about 1/8" to the RIGHT from the stiffening bump (I'm not sure what you call that thing that's pounded into the firewall...but it strengthens it) in the upper firewall. It's to the LEFT of the fuel/oil pressure manifold that gets mounted to the firewall. (I'm telling you that because there are multiple stiffening bumps) As a second reference point it's roughly 13.75" from the left upper engine mount bolt. That will get you pretty close to the location that I used. If I did it again I'd move it up maybe .25 to .5" but then you'd have to get a longer cable as well. That said, it will work fine as is...but you'll want to put a rubber cushion on the engine mount so they can't touch. |
|||
 |
 |
 |
 |
This week the weather is turning good again so time to get the painting completed! Above is a pic of the masking plastic I got at the local hardware store. I really like this stuff! I was worried about it being thin but it is perfect. It's almost like it's electrostatically charged and it seems to attract the dust and overspray, keeping it off of your paint. Great and cheap. After doing the epoxy primer on my windshield fairing and the areas on the fuselage I filled rivet heads and skin seams, I could see where I needed any additional sanding, and filled any pinholes. Then a coat of high-build primer to sand perfectly smooth and it's ready to scuff and paint with the white coat. The booth is working out absolutely fantastically...and it was such an inexpensive investment! |
|||
 |
 |
 |
 |
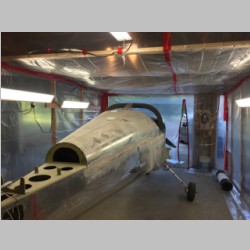
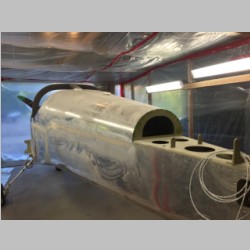
Fuselage Paint
 |
 |
 |
 |
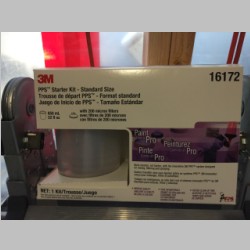
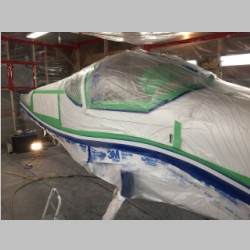
With the filled areas primed the night before, it was time to do a good scuff job and prepare the fuselage for the base paint. Scuffing the entire plane didn't take too long, but wiping it down until the rags were clean took many passes. Amazing how much black you can pull out of sanded aluminum. Below you can see one of the other products I had to get to do the paint shoot. I picked up a 3M PPS starter kit, number 16172. This is the standard cup size container. In retrospect I could have easily gone with the "large" instead. We refilled at least once if not twice to do the sealer, and refilled probably 4 or 5 times doing the pain. The PPS kit is required because you will be painting upside down. The paint cups normally have a vent hole on top. This is good because with a gravity feed gun, having it well vented allows the full weight of the paint to be sucked down into the gun under the pressure from the weight of the liquid in the cup. The problem is, if you're painting upside down, the gun won't continue to get paint. But the PPS cups fix that. They are unvented, and you start by spraing the gun upside down which sucks all the air out of the cup. Once you do that, the internal liner shrinks as required to keep you spraying paint at all angles. It's a pretty good system. I did run into a problem that I'm not sure of the cause yet, that I'll mention below. |
|||
 |
 |
 |
 |
Hvaing primed all the filled areas, today was all about spraying aluminum. So the first coat was the DX1791/DX1792 chrome etch primer. This sprayed really easily and doesn't require a thick layer. Basically the chrome etch reacts with the aluminum to dig in and bite the paint. If you spray too much, you're putting more chemical on than the paint can react with. So you put just a light coat on. Then you seal it up so it doesn't bleed through. The drying time on the etch primer is only about 15 minutes but we gave it 30 minutes, and then ran lightly over it with scotchbrite to remove any roughness before spraying the sealer. We also hit it with a tack cloth. |
|||
 |
 |
 |
 |
In the rows above and below you can see the sealer after spraying it on. Here I thought I'd have too little sealer, having only bought 1 gallon, and then getting that additional dark grey quart. As it turns out, now that I've sealed everything but the wings and cowling, I'm sure I have way more sealer than I'll need. Oh well, it's only money. If I'd have known I probably could have saved a couple hundred bucks. But, not having stuff on hand would slow us down, so better to have extra. We mixed the dark grey with the white and got a very light grey...just to keep from having 2 cans to maintain. The sealer sprayed on very nicely. I was thrilled with the results. The upside down painting went much easier than I expected. I wasn't the one who had painted the underside of the RV-10, so this was a first for me. The drying time on the sealer was only something like 15-30 minutes so we gave it 30 and then started mixing up the paint. |
|||
 |
 |
 |
 |
 |
 |
 |
 |
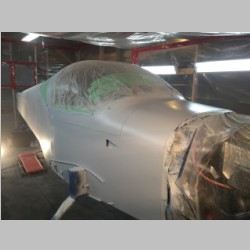
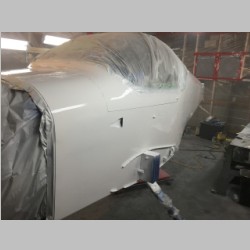
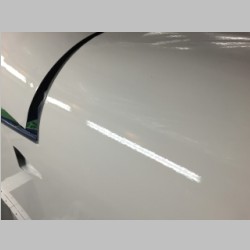
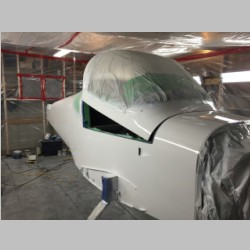
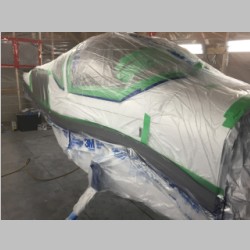
With the sealer dry, it was time to lay down the paint. I ended up with a bit of a panic on this one. I SHOULD have sprayed in a non-critical area first, like the wing root, but I didn't...I went right for the front deck. I ended up having something goofy happen with the gun. It *may* have been the PPS cups had air in them, but I don't think so. Or it could have been the slightly less gravity feed you get...but I don't think so on that either. I think the paint gun was just getting some paint congealing in the nozzle that interfered with the paint flow. What happened was the gun wasn't spraying a very heavy amount of paint, and it was coming out in small globs, not atomized well. So I started to get an orange-peeled look. I first tried to "fix" it by moving slow and filling it thick, but I could tell in seconds that this wasn't going to work. I freaked a bit and went to remove the PPS cup, and sprayed lacquer thinner into the gun. After a second it sprayed better. I then pulled the air cup and sprayed more thinner in and sprayed the gun until it pissed out a good solid stream of thinner. Then I threw the cap back on and sprayed the booth wall to test it. Fixed! Back to the front. I layed on the paint nice and thick, trying to reduce the orange peel. For the most part it worked. It made it far better. It isn't perfect, but did get much better. We did two nice thick coats of white on the plane and the gun did this at least 3 more times...each time throwing me into a fit of panic, because I didn't want to lose the "wet edge" and have the paint not even out. In the end the paint laid down nicely most everywhere except for the front right area on the tip-up canopy. The entire canopy will be soon painted in blue, with clearcoat. So this will give me an opportunity to fix the white base before I spray over it. I'm going to talk to the paint store today and see if they can identify the problem I had, and give advice. I'm guessing that as long as I am careful, I can sand that white down a bit (it's on nice and thick anyway) and get it smoother before I lay down the blue base. But even if I don't, I think the orange peel will reduce once I add the clear coat. That stuff flows out very well. The white is DMC900 tint base from PPG. I liked that color white, and since it's a tint base, it should be available for a LONG time because it's what all of the PPG concept paint is mixed from. It can be mixed with a variety of hardeners. They sold me the DCX61 for this one, so it was mixed 4:2:1, being 4 parts Paint, 2 parts DT870 Reducer, and 1 part Hardener. If you use DU5 or DU6 hardener, the ratios of reducer and hardener are flipped, so I assume the DCX61 is just faster and thicker. The pot life is 1-3 hours with the hardener I used, and 2-4 hours with the other. For my notes, I shot the paint at about 26-27psi. With the hardener I used (DCX61), the time between coats is 10-15 minutes, so we pre-mixed all of our paint for both coats, and basically painted continuously, start to finish, twice. The dust free time is 30-50 minutes. Tack free is 2-3.5 hours, and tape free is 8-10 hours. I was able to go touch the paint within 30-45 minutes of spraying it. We finished just before 10pm, and the next morning the paint was looking pretty nice. I propped the canopy open to see how my masking job worked out, and to break the paint line where the front seal is. I didn't want to lay down that much paint and not crack it before spraying the blue and clear. All was well. |
|||
 |
 |
 |
 |
Striping and Numbering
 |
 |
 |
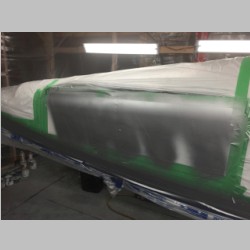
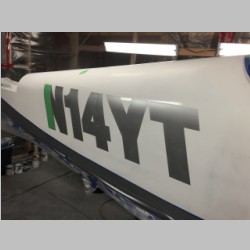
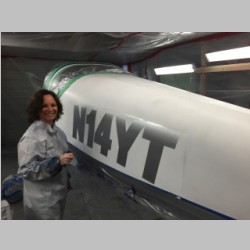
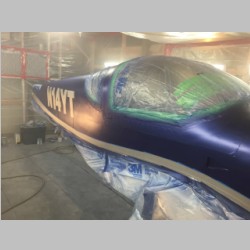
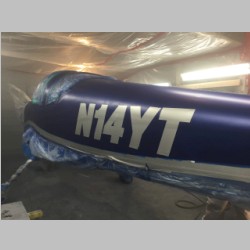
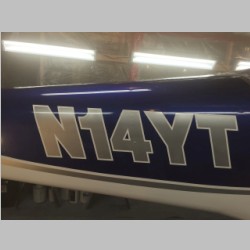
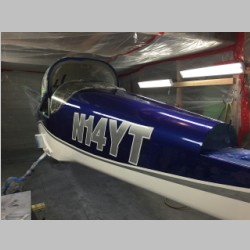
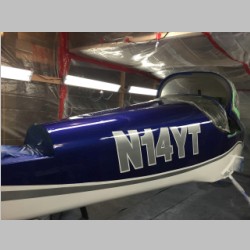
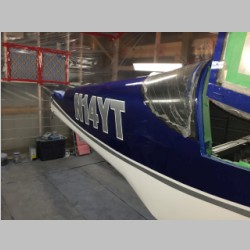
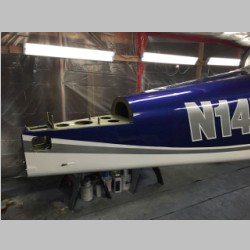
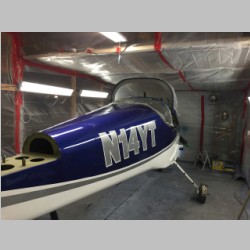
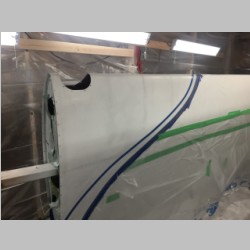
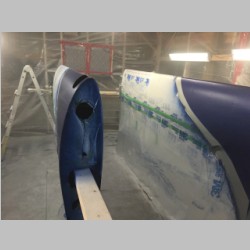
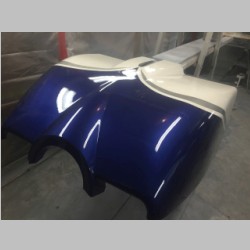
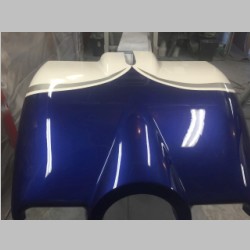
It's been lots of work getting to this point and I'm starting to run out of gas, so rather than try to get more done this evening we just spent a few hours laying out the stripe pattern and N-Numbers. The striping is no easy task. I'm not really sure how the pros do it, when they work with really complex patterns, but they either have great tools or a great eye for it. For us, we have a roll of tape and 2 pairs of eyes. You stick down one end of the tape and pull out at least 10' of it, and eye down the side of the fuselage while one person slides their hand over the tape pressing it down, and the other guides the free end in a smooth curving motion. Straight lines would be super easy, but nice curves can be tough. It is surprising how even from 20' back, the naked eye can easily spot a 1/4" difference in a good looking stripe, or even a 1/8" difference in a stripe with a slight defect. Even in these photos I can spot imperfections. The question is, what are you willing to live with when you're done? I think the actual painted stripes will look nicer than the outlined stripes, but time will tell. Once we had one side roughly created, we stuck tape markers and measured locations to ensure the stripe on the other side would be within about 1/8" of the points as it followed it's own curve. Realistically, since you can only see one side at a time, this is much less critical than you'd think, but, it's nice if they at least have some symmetry. You'll notice we did this without the cowl installed. That's a leap of faith on it's own. We're hoping the lines we started will be able to look nice on the cowl as well. One way or the other, we're going to have to make it work, because this is going to be painted first. 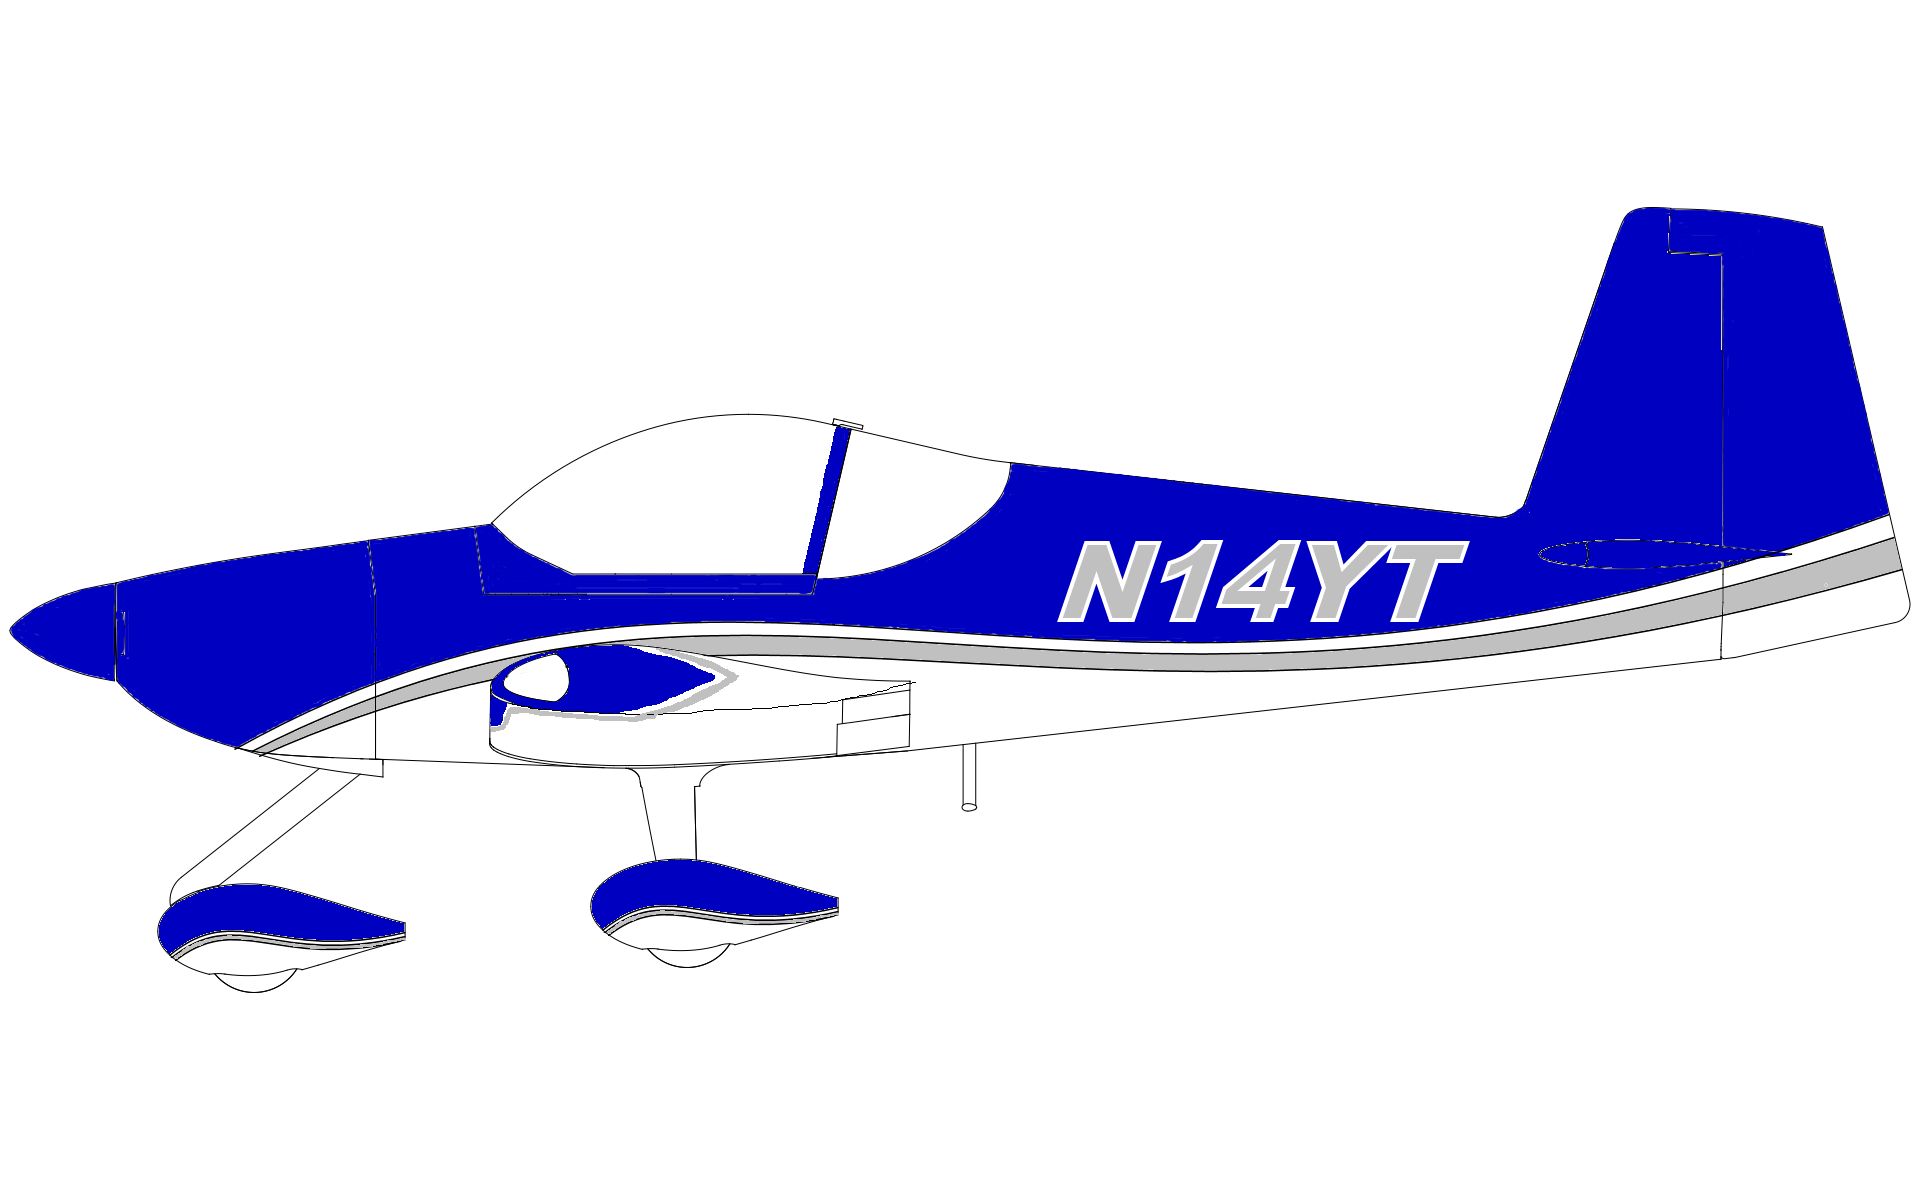 Below you can see the 2nd tape line added to mask off the silver stripe. I'm not sure which part I want to paint first, the blue or the silver, but I'm leaning towards the silver. Also, you'll notice I was able to fit the N-Number in above the white and all into the blue. This was a bonus of it's own. On my RV-10 I had a real nice looking N-Number paint job, but it took more work getting a blue outline integrated into a blue and silver stripe. With this paint job I only have a white outline that is already painted, and a silver lettering to paint and peel. It's a fairly basic paint job...not an award winner, and this helped keep it simple. |
||
 |
 |
|
Finishing the Fuselage
 |
 |
 |
 |
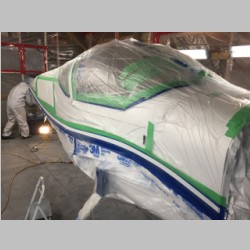
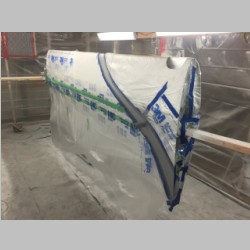
In finishing the fuselage there are a lot of steps to do to get everything right. After laying out the stripe pattern and N-Number stencil, it was time to tape and plastic off the fuselage. I used PVC electrical tape for the stripe pattern, and a vinyl stencil with an outline font from a local sign company for the N-Number, but we wanted more masking than that. The PVC tape sticks well but tends to be easy to peel up if you hit a corner of the tape, so we first extended the tape by overlaying blue masking tape. For some reason the green stuff we have really doesn't have much grip but the blue works much better. Now with a wider tape base, we used more tape to attach the plastic to our tape border, and basically wrap the whole fuselage. Even after finishing the fuselage the $15 roll of plastic still has a bunch left. Next, with the Stencil in place, you have to pick out the center of the stencil...the actual letters to paint, in our case, the silver. So now we were maksed for our silver stripe and letters. See below for a couple of pics of the silver sprayed on. |
|||
 |
 |
 |
 |
 |
 |
 |
 |
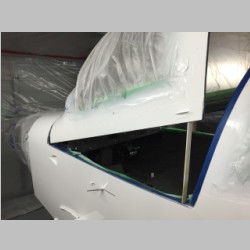
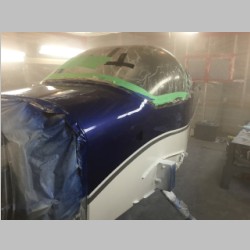
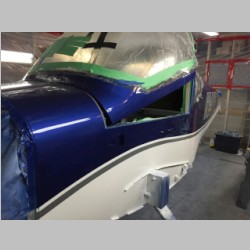
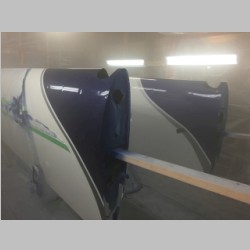
With the silver lettering on the plane I could just start to see the paint scheme come to life and it started to get more exciting. Before we started the blue, we stopped for a minute. The white paint that had been sprayed over the roll bar area and was stuck to the plastic, was at times flaking off if you hit it with a blow gun. It may not have flaked with a paint gun, but we didn't want to risk it. Additionally, one of the things you want to do is get the clear coat or final paint layer to flow over the edges of the paint nicely around the windows and the lettering. This means it was time to pull the tape all the way down to the windows and replace all of the plastic. With the plastic removed, I layed a brand new PVC tape layer on the windows...almost tight to the existing white paint, but with just the smallest sliver of gap..barely visible. This was to be the place that the blue could flow in and create a more nice colored edge, and then the clear could flow over top and kind of round it off. Clear coat tends to smooth any rough edges. More on that below. We then re-masked the windows and had all of the top plastic removed from the plane because this next step was to paint the blue. Note that since we had plucked the lettering out of the stencil, the now silver letters needed to be masked off before painting the blue, so we used 1 solid layer of masking tape, plus another layer over that one perpendicular to keep it from peeling up. Having an outline font makes this job MUCH easier because you can tape half way over the vinyl stencil outline...so keeping the edge nice isn't too hard. |
|||
 |
 |
 |
 |
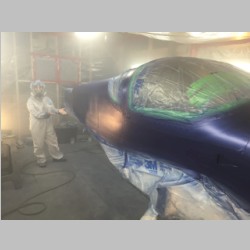
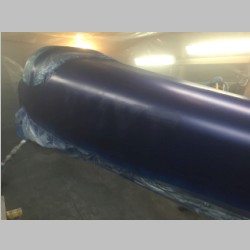
Shooting the blue I had a momeny of panic. I only had a bit over 1/2 quart of blue left. I had only bought 1 quart, and I used a lot of it on all of the tail pieces. I wasn't sure how much to buy, and at $175/qt I didn't want to over buy. But now I was in a real pickle...I didn't have a good idea how much I would need to do 2 coats of blue, but I doubted I'd make it. I was regretting not buying 2 quarts right about now. You also have to clear the colors within 24 hours of painting them. So worst case, I would need to rush in for paint first thing in the morning and then get home and spray whatever coat I wasn't finished with, and then one more coat to get it fresh and even again. After getting the first coat on, I was REALLY worried. I used a lot of blue trying to get that initial coverage, and I wasn't going to try to stretch the 2nd coat by going lighter. If I ran out, I was just going to have to suck it up and fix it. I took all of the remaining blue in the can after doing the first coat, and I only had 7.5oz or so, which reduces down to 15oz sprayable. I filled the gun with everything I had and started the 2nd coat. I tried not to be slow anywhere, and be as consistent and even and perfect as possible. Then I got the surprise of a lifetime and actually completed the entire coat! Not only that but I probably had about 5-10 seconds of spray time remaining in the gun, so I was able to walk around any look for anywhere that may need it. It worked out perfectly. |
|||
 |
 |
 |
 |
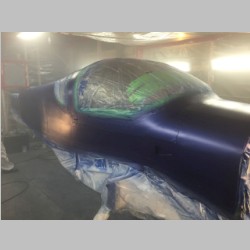
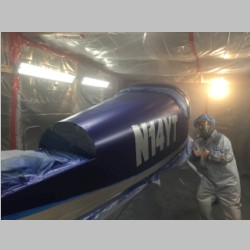
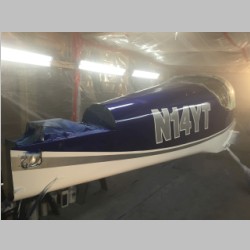
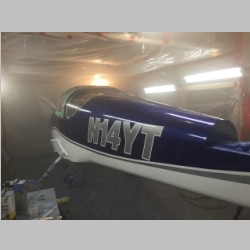
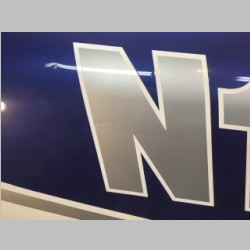
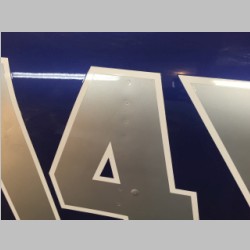
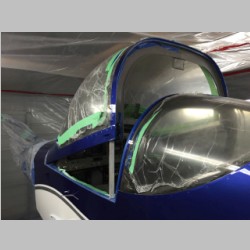
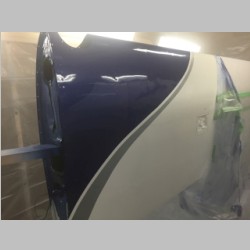
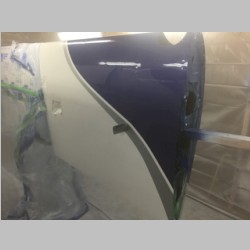
With the blue now laid down as well, and a less than 15 minute dry time, it was now time to unmask the silver once again, so that the blue and silver could be clear coated with 2 coats of clear. We carefully plucked our masking tape off the n-numbers and the stripe, but left the white covered. We didn't want that to be cleared, especially since it was never scuffed. We had plenty of clear so there wasn't an issue with remaining quantity there, thank goodness. The clear is sticky, messy stuff, and here is where my biggest problems came on the paint. I think my exhaust filters were ok but getting fuller, but clear is really intense on the filters, and it creates a huge cloud. It got so bad in the booth that you couldn't really see well without being perfectly in the right lighting, so you had to be extra careful. Half way through the clear coat my respirator filter was clearly used, so I had to exit and swap that. It was so easy to tell when it happened...you go from smelling nothing to smelling paint. I may have bumped the pre-filter retainer on it as I could see a lot of blue under the prefilter, so I think it wasn't in place well. But with a new filter on, I was able to complete the job. I ended up with 2 or maybe 3 places where I couldn't see well enough and I got a run in the clear. It was sad too that one of them is on the N-Number, where it's pretty visible. But, when I'm done with the paint job I'm going to count the defects that bug me, and assign them all a dollar value. Something tells me that with the thousands...or actually more than $10,000 that I save, the actual "defects" will be acceptable. If you get to OSH, come insult my paint job. I'll try to suck it up and take it, as long as you're happy to compare invoices. :) With the clear there is also one step that I think is rather critical. The clear is really a flowing cover. When we were done spraying the clear, you could see a nice smooth stepped area where it rode up over the vinyl N-Number stencil, for instance. If you wait too long to peel it, it will not only be harder to peel, but you WANT that edge to be just on the verge of flowing, if you're going to have an edge to your clear...such as by a windshield. So I didn't even stop and clean my gun when we were done spraying. The clear has a very fast set time, and I think time between coats is only 5-10 minutes. So you can work with it right away. This is both good and bad. We started by removing the masking below the silver stripe, trying to keep the wet paint masking tape from touching anything. We did that first because even if it was still too flowing, we couldn't wreck too much. With the stripe removed, we started plucking the outline off from the N-Number stencil so it would flow on the edge of the paint there. The stencil broke many times, and a couple times the broken dangle hit the N-Number. Had I gone slower it would have probably been ok, but we were trying to get it off while it as flowing, and you could tell it was starting to set up. One tip is to have a small needle nose pliers or a tweezers handy...it may make the plucking process faster. We then moved on to the windshield. We save that for last because I didn't want to mess up the plexi, but it went pretty well, actually, and in no time we had all of the plastic off the windshield other than the original packing plastic. Now the clear could melt into the edge a little and smooth out. I wish I could have tipped the canopy up too, but with all the paint in the air that would have been too risky. |
|||
 |
 |
 |
 |
 |
 |
 |
 |
 |
 |
 |
 |
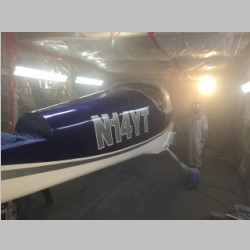
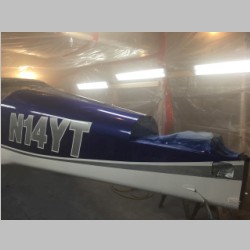
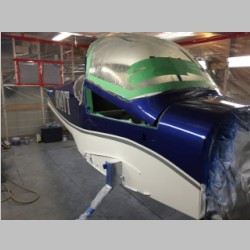
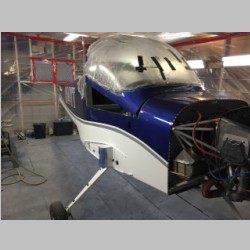
These remaining pics are from the following morning. Canopy open, I removed the masking from the seams. Before painting, the only seal I had in place was the aft seal on the tip-up. So under the edges what I did was mask the side rails, but then add an additional tape layer with a 1/4" ridge or flap in the middle of the tape, acting as a paint barrier. It ended up working perfectly, keeping paint from the interior of the plane. All in all, I was pretty happy with the way it turned out. The biggest pain is that the side access plate on the tail is a 3-color plate...so when I get to painting all those parts I may be spraying multiple colors. We'll see how that goes. Next up is the wingtips, cowling, and wings. |
|||
 |
 |
 |
 |
 |
 |
 |
 |
Painting the Wings
 |
 |
 |
 |
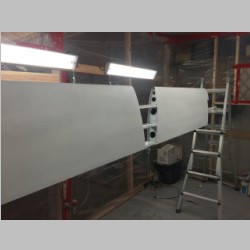
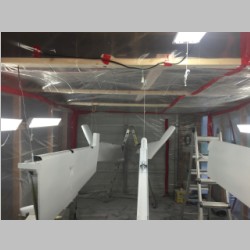
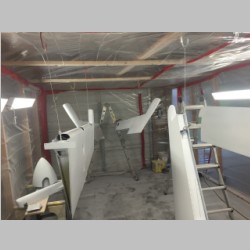
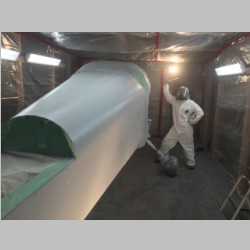
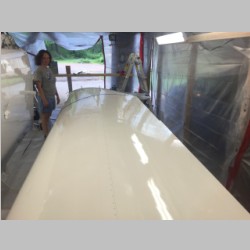
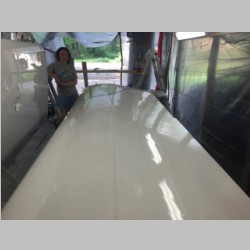
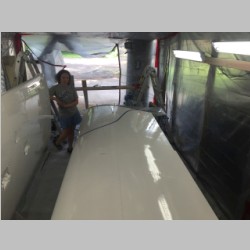
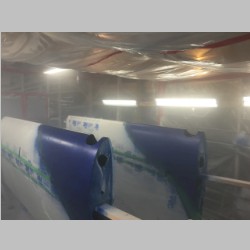
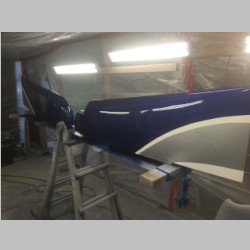
I was really glad at this point that I went with a 12' width for the paint booth. There's almost no way I could have painted both wings at the same time if I had not had that space. We racked them up with 4 step ladders, with leading edges up in hopes for the best paint job to be on the leading edge. Luckily the wings don't have any fiberglass on them at all, so it's all just one process to paint them, and other than a good scuff and clean there really isn't much to the preparation. The first day we scuffed the wings, and then etch primed them, and sealed them. The etch primer is very interesting to watch when spraying it on such a big surface. When sprayed it goes on yellow, but very soon after, the chrome etch starts to react with the aluminum, turning it a darker dirty bronze color. The primer doesn't take long to dry, and after it we scotchrbrited it quick to remove any roughness, then degreased it one more time. The sealer sprayed on really well. The booth did get a little cloudy near the end of the 2nd coat and I ended up only having one blemish I could find, in an area where I sprayed just a little too long. So I waited until the next day to wet sand it a bit to reduce it to a minimum. It isn't completely gone, but it's definitely better now. |
|||
 |
 |
 |
 |
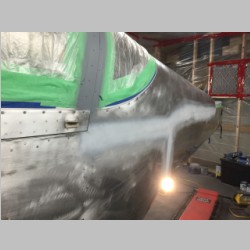
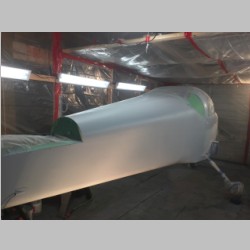
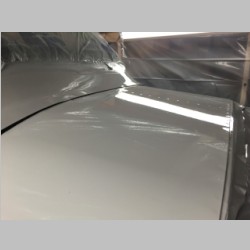
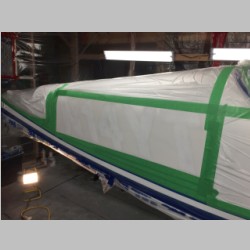
The following day we laid down the white paint on the wings. Originally I thought this turned out well, but after laying out the wing for striping of color, I decided it wasn't good enough. I'm not sure what the cause was exactly, but I had quite a bit of orange peel on the top surface of the wings. I did minimize some of the problems while painting this time, however. Worried about the PPS cups and the way I had small splatters of paint at a couple points on the fuselage, I started a routine with the wings. Every paint refill I would spray thinner into the gun and spray it clear and also squirt the outside of the air cup. That way it was completely unplugged for the start of every spray. Interestingly the paint always sprayed smoothest for the first couple minutes of every fill. For the wings I started with the trailing edge, then went on to the bottom, starting at the spar seam with a fresh fill. That would give me enough paint to do a continuous spray from that seam up over the leading edge, and down the entire top side of the wing. Then I went to the back and went from the seam down to the trailing edge. What was interesting to me is that right after a cup fill, the when I started the underside of the leading edge, the paint flowed out beautifully. But it was after spraying maybe 1/4 of the volume that the orange peel picked up...and it got progressively slightly worse. I wonder if that is from the PPS cup restricting the gravity feed of the paint. The other factor that could have caused the orange peel is that I was spraying in over 82F temperatures. My reducer (DT870) is supposed to work well from 65F to 80F. From 75F to 90F you would use DT885. I know that temperature is one of the very biggest causes of orange peel. Air pressure is another. I sprayed this at 26-27psi, which should be in line with what I had been using. As far as quantity goes, I mixed up probably 88 oz of paint for the first coat (that's the total sprayable mixed, not paint only). That left me over almost 22-24oz of paint. So for the 2nd spray I mixed up 64oz, which was still too much in the end. I ended up throwing away probably 20-22oz of mixed paint. Not the end of the world, but at $420+ per gallon you don't wan to waste much. It wasn't until the 2nd coat that I even got into my 2nd gallon of DMC900. It made me wish I had bought 1 gallon and 4 quarts, because from the looks of it I will need less than 1.5 gallons to finish the job. So I could have saved a couple hundred bucks on paint. But, worth more than saving $200 is not running out in the middle of a spray, so I won't complain about throwing away the paint. And, at this point, I don't think I have any more need to use the PPS cups that I bought. I don't think I have any more upside-down spraying to do. The weather has shifted here, and whereas a week ago I was struggling to find days in the 60's so I could spray, the outlook now is all high 70's and 80's....and after spraying the white in the booth in the 80's I can say I'd rather spray in the 60's. It gets quite warm in there. Before I continue with the colors, it's time to wet sand and re-spray the portions of the wing I'm not happy with. |
|||
 |
 |
 |
 |
Wingtip Design
 |
 |
 |
 |
It's surprisingly hard for me to come up with a wingtip paint design. I wanted to do them on a paint program but with limited time available it was quicker to just pencil and marker them in. Above are some concepts I looked at. The biggest goal was to avoid having any color on the ailerons or flaps, to make it easier/cheaper to paint them in case of damage, and while I was doing this painting. 2 and 5 are very similar to my current RV-10 and there is some push to keep this one slightly different, so right now I'm leaning towards #4. Above you can see a pic of #4 being laid out, then a coupe variations of #2/5, but in the 4th photo in the row below is #4 again. Intermixed with those are some pics of horrible orange peel that I'll have to fix. |
|||
 |
 |
 |
 |
 |
 |
 |
|
Re-Paint wings and Paint Control Surfaces
 |
 |
 |
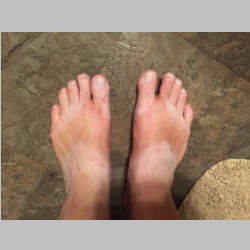 |
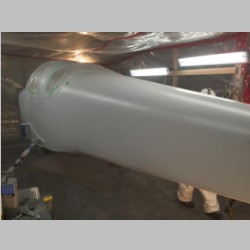
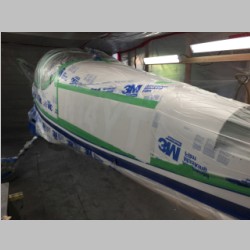
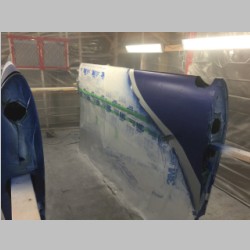
Unhappy with the rough orange peel on the wings, I had to wait out the weather a bit and gather the right DT885 reducer for warmer temps before I could attempt a re-paint. Thinking back to painting the RV10, I think we had to repaint those wings due to orange peel also. I went into the process dreading it a bit, mainly unhappy to be slowed down. But after purchasing an inexpensive DA sander and some discs, I got the wing sanding done in an hour or two at the most. It smoothed out all of the roughness and provided a good surface to spray on. Not only that but I'll have a little more thickness to the paint which I would actually prefer. I'm thinking 3 coats would be nice in some cases. With some time waiting for good paint days, I got my tail intersection fairing all fit and drilled. Being warm these days, shorts and flip flops are the only way to be comfortable. So I'm attempting to put a paint scheme on my feet, obviously. The re-spray of the wings went very well and I was very happy with how they came out. I don't have any pictures of the bare white wings, but we dove right into the stripe patterning. This turns out to be one of the harder tasks in painting a plane, and is one of the big reasons I suggest simple paint schemes. First, to do the tape lines we wanted to have it look nice so we laid the first wing horizontal and attached the tip again. Then we laid out a good stripe pattern on it. Ideally you'd lay them all out flat but you will want access to the original to look at as you do the 2nd wing and bottom sides. We cut a sheet of heavy 4 or 6 mil plastic to a size of our stripe area, and then trimmed the plastic to the curve of the stripe. Then using that plastic sheet, we taped it on to the other wings and attempted to free-hand the tape lines again, using the curvy edge of the plastic as a guide. After laying it out we found that in general we were within 1/4" everywhere, so it came out real well. I adjusted the bottom curves slightly due to the interference from the pitot mast, which gave me the opportunity to paint it silver which I think looks real good. After the stripes were all laid out it was time to mask the entire wing except for the areas to be painted, and then scuff up the white base. |
|||
 |
 |
 |
 |
We first had to mask everything but the silver, and then once the silver was sprayed we taped it off and painted the blue. You can see the more dull blue that the base coat leaves when applied. With both the blue and silver sprayed on, it was time to clear both colors, so remove the tape from the silver and lay down the coats of clear. Then as with the fuselage, almost immediately after finishing the clear, you pull the tape from next to the stripe lines to let the edge soften. Two rows down you can see the plastic pulled back immediately after clear coating. Then the next morning we removed the plastic from the entire pair of wings. |
|||
 |
 |
 |
 |
 |
 |
 |
 |
 |
 |
 |
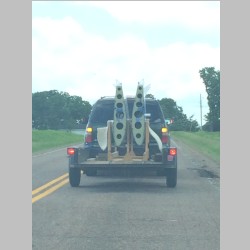 |
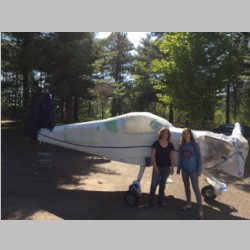
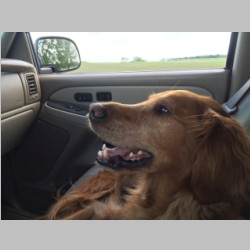
With the wings completed we had to wait for dry weather again to move them to the airport, which I did by using the wing cradle and a trailer. Below you can see them at the hangar. Although the paint was dry, since we were leaving them for a couple days before they were installed, we blocked the outboard ends up so they weren 't laying on the cradle carpet, just to prevent any patterning in the clear coat from still-curing clear. My helper dog was happy to be running back and forth to the hangar for the day. |
|||
 |
 |
 |
 |
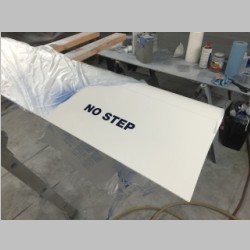
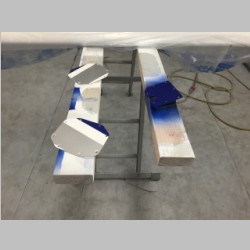
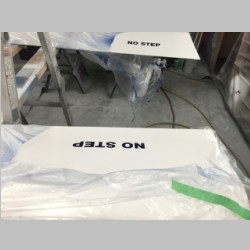
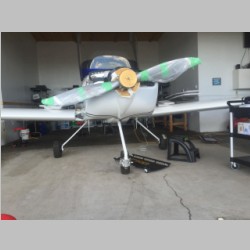
Not wanting to waste any good weather day, I immediately set up the ailerons and flaps for priming and sealing. One thing I wasn't happy with were the pop rivets that leave holes in the control surfaces, so I spent a little extra time filling most (I missed a couple) of the rivet stem holes with epoxy, and even some of the rivet edges with spot putty. I'm really liking the spot putty and there are some places I wish I'd have done that everywhere. I think the wings would look real good with filled rivet heads...if for no other reason than to ensure the paint flows fully around the rivets. Apparently I didn't get many pics of the etching primer, nor the white paint when completed, but within 2 days I had them primed, sealed, and painted white. I did all of the access plates and covers at this time also, to the seal stage, and painted anything white that needed it, except for the steps and 2 small spots on the tail intersection covers. Now I just need to paint the "No Step" on the flaps and all of these pieces are basically done. The remaining parts are: Cowling, Wingtips, Steps, and then later next month the gear leg and wheel fairings. |
|||
 |
 |
 |
 |
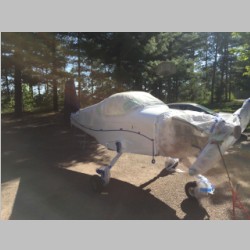
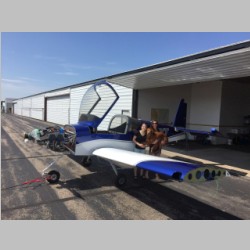
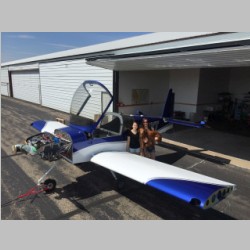
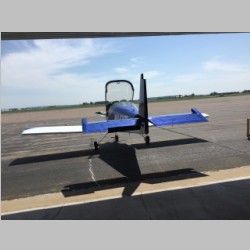
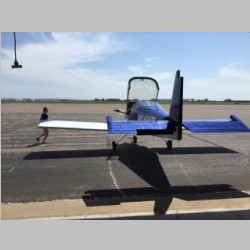
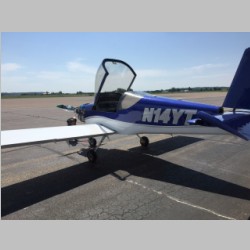
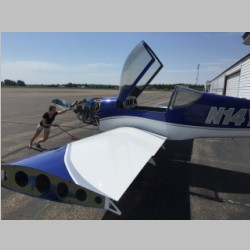
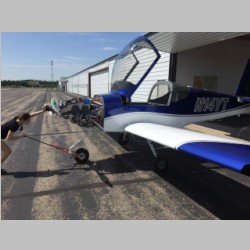
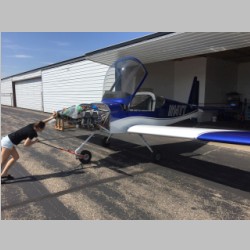
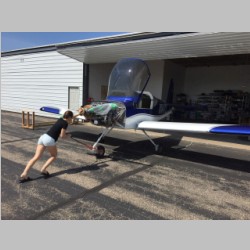
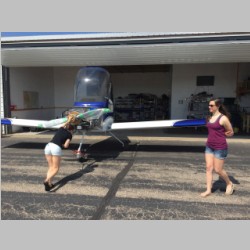
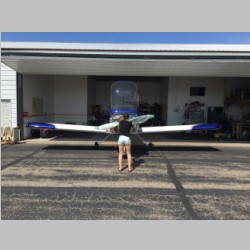
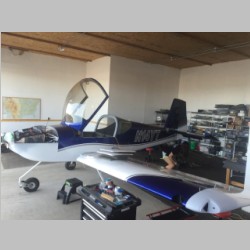
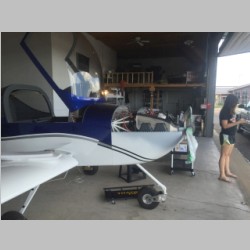
With my nephews graduation party to go to, I skipped a day of painting but we still had time to get out to the hangar in the a.m. and attach the wings. The worst part about attaching them was just the laminated spar plates that kept wanting to pop out as the bolt came through, otherwise the wing install went really well. My pilot-to-be daughter wanted to be the first to push the now wing-ed plane back into the hangar after we took a few photos. |
|||
 |
 |
 |
 |
 |
 |
 |
 |
 |
 |
 |
 |
Final Parts Painting
 |
 |
 |
 |
With the month moving on and the summer weather hitting I was getting itchy to get ALL of the parts out to the hangar and be done painting. Let me tell you after all the effort put into painting the plane, I will say these comments and bits of wisdom. First, Painting the plane is a considerable task, but I think it feels very rewarding also. Despite my best attempts, I have plenty of areas on the paint that I'm not thrilled with. I strived for perfection but fell far short. Feel free to gawk and notice all the mistakes. I did end up with some runs, mainly in the clear coat, that I may or may not ever try to fix. I'm not as concerned with cosmetics as I am with longevity, so I'm hoping the paint simply holds up well. I have already managed to bang up and chip a couple of parts, so I guess my thought is that eventually this stuff is going to be covered in oil, bugs, and dust anyway, so while perfection is nice, I'm happy with "pretty nice". If perfection is your goal, definitely hire it out. Next, Prep work is the key to everything. It is also the time consuming part. If you hire anyone to help you, that would be where I'd put in the resources...it could speed things up. That said, a nearby paint shop takes 6 weeks to paint a plane, and it took me maybe 4, and that wasn't being as prepared or dedicated as I could have been. Then, when painting things like the wings, I think if I were doing it all over again, I'd spend a little time and build a wing rotisserie to be able to get the paint to lay and flow best. Sure, with good technique it isn't needed, but it would have made things come out easier. I do think the PPS cups work ok, but they seem to change things for the paint I used, and I think the paint comes out better without them. So, to get the paint to turn out nice, I'd avoid them where possible. On the wings, the only thing I needed them for was the bottom...I should have just only used them there. That would probably have made all the difference. Also, although paint FEELS critical, it really isn't that hard to rework an area. If you make a mistake on the fuselage, you're in for some extra paint cost, but other than that, you can fix most anything. I had a couple of issues along the way...one time I had bad masking and got some blue on the silver. I repainted the silver. THen the plastic flapped and hit the silver...I decided to leave the slight messed up area. The same thing happened on the white. Sure, I could be a perfectionist and repaint the area, but that costs time and money and effort and at a certain point the value of all your effort just isn't worth it. My paint job will never win an award, but it will look good in the air, and that's where it matters to me. Finally, painting your plane is well within reach for most people. The equipment costs aren't that high, and the savings are considerable. My paint supplies cost me under $4000 I think, and a similar paint job would be definitely over $10,000. Sure, it may turn out better, but if someone handed you $6000 in cash, think about what you could do with that. $6,000 will cover my insurance for 1 year, plus over 125 hours of flying fuel and oil and time. That's a hell of a lot of money to be throwing away for paint. I heard the saying years ago "you can't fly paint", and it's true. I don't have much of an affection for unpainted RV's....believe me, they are an eyesore to aerial photos when mixed with nice looking planes, but it's true...if you're having to go on the cheap, going without paint will help. So overall, I'm very happy with how the paint turned out, and I'm glad I did it. I think it was sometimes one of the more fun stages of the build, actually. |
|||
 |
 |
 |
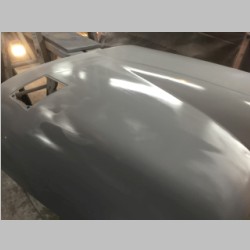 |
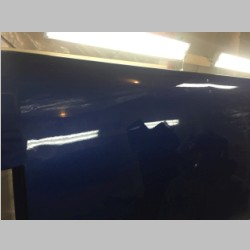
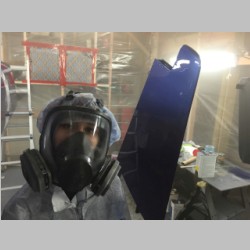
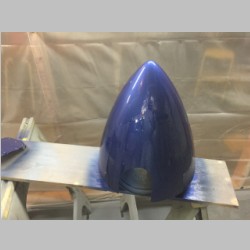
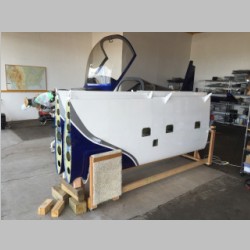
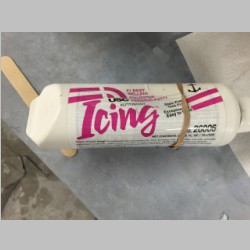
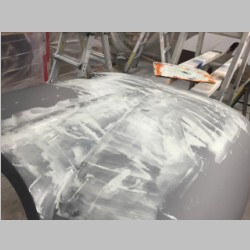
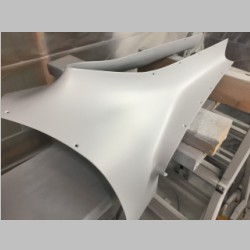
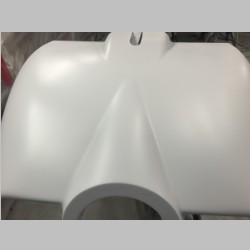
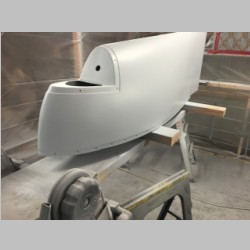
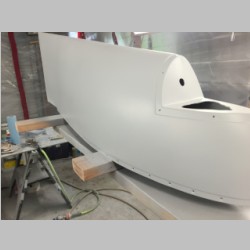
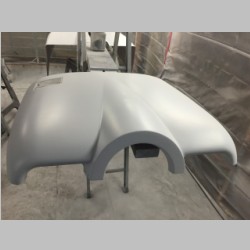
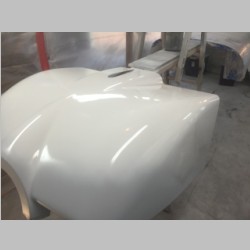
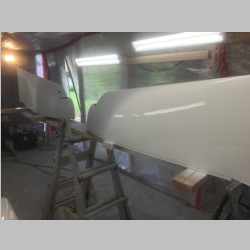
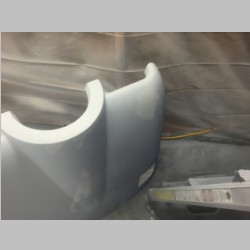
When I originally opened my cowl I was thrilled that it was grey. My cowl on the RV-10 was green, and was FULL of pinholes. I thought the grey looked much better, and seemed like it had far fewer holes. That was perhaps true...the wingtips were actually pretty good, but as I found after priming the cowl with epoxy (not meant to be sanded), I learned the hard lesson...the grey cowls also suck. They are loaded with pinholes. So off to the store I went. My little tube of spot putty was running out from all the other pieces, and this was a bigger job. I decided to try a 2 part "icing" product. My goal was to squeegee it in and get as little as possible on the cowl, so there would be less to sand off. One thing that was both a positive and a negative was the way I started the process... The night before, after spraying the epoxy primer, I saved the extra. Once I saw all the pinholes, I thought that my first step would be to try to fill them with epoxy. I think this was good, actually. I took a paper towel (should have used a rag) and rubbed it into the cowl. That really filled a lot of pinholes. The negative? That stuff sands horribly...and I left streaks like a brush painted effect all over the cowl. It took a LOT of effort to sand the epoxy primer down enough to get a good surface. Once I had it sanded, I used the flowable polyester icing and squeeged that into the cowl. You can see the pinholes filled by the icing in the photos above. The goal again is to squeege it on super thin so that there are no areas to sand through thick layers. The PROBLEM with that is that it takes a lot of time and effort to get it thin. Each batch starts to set up in 3 or 4 minutes so you can only mix small batches (best done on a plastic sheet or coated paper plate) and have to use it quickly. Once it's all dry you can sand it smooth using a block. It took me a while to get the stuff sanded real well, but it worked out. Once I laid the next layer of primer down, there were maybe only 10-15 pinholes left that I could find, which I used spot putty on. A couple of coats of sandable K36 high build primer and it was looking REALLY nice. Actually, it looked so nice that I was very happy and it was almost a shame to paint them! :) See below for those pics. (I didn't use sealer on these by the way...just Epoxy, K36, and then right into paint) |
|||
 |
 |
 |
 |
 |
 |
 |
 |
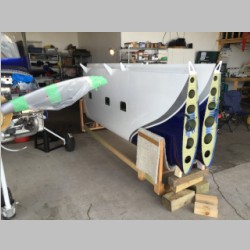
Once the parts were all primed, I had to get the stripe pattern laid out. I decided to do it the same way, but conserve paint, so rather than paint the entire piece white and then stripe it, I shot areas of the parts that I knew I'd be striping, and left the others. |
|||
 |
 |
 |
 |
 |
 |
 |
 |
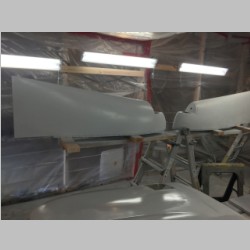
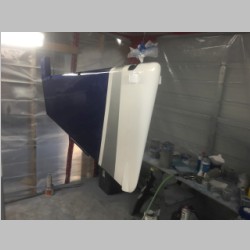
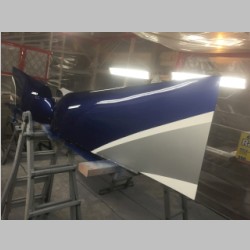
Time to take the half painted parts to the hangar and get the stripe patterns all lined up. We attached the wingtips, cowl and rudder, and taped the stripe pattern on. It took a while to come up with a way to terminate (or continue) the silver stripe on the front cowl. Nobody in the family liked how the Van's demo RV14 had the stripe wrap around, but when we thought of the sweep back we all liked it. That took some time to get right, but once we had it taped off it was easy to paint. |
|||
 |
 |
 |
 |
 |
 |
 |
 |
 |
 |
 |
 |
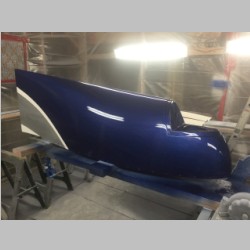
Sadly, I underestimated the amount of blue paint we'd need, and I ran out with just the top cowl, intersection fairing, and a couple of other pieces that needed painting, so I bought another quart (no shelf life) for the future gear parts if we do blue, and for repairs. |
|||
 |
 |
 |
 |
 |
 |
 |
 |
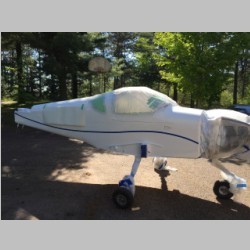
So above are the pictures of the remaining parts. This will end my section on painting the RV-14...the only painting left is a couple of touch-ups on chips, and the wheel and leg fairings once I start on them. Now it's time to head to the hangar and get this thing assembled and flying!
Previous | Site Home | Next