January Update
added 1/24/2015
Fuselage
Continued / Brake
and Fuel Lines / Panel
Part 1 / Interior Paint
This update took a while to get out because I was working in
various sections on multiple simultaneous things, and I wanted
to get a little completion to the some of the things before I
moved on with an update. I split this update into 4
sections to keep the topics a bit focused. See below for
the update...
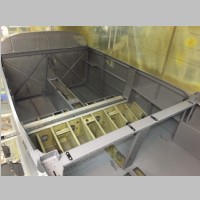
Continuing Fuselage

Brake and Fuel Lines
| One thing I knew going into the
fuel and brake line section was that I wasn't going to be
using the included fuel and brake lines by Van's.
Van's uses plastic tubing for the brake lines, which I
personally consider inadequate, even if they do hold the
pressure. There isn't enough chafe protection, I
want more durability, I want more resistance from becoming
brittle, and I want something that will hold up far
better. Solid lines aren't really a good option for
brakes in the RV14 due to the routing they take. In
the RV-10 I had switched to -3 sized stainless braided
teflon hoses, with a clear vinyl over protection cover,
and I wanted to do the same thing in the RV-14, so I
contacted Steve at Aircraft
Speciatly and Tom at TS Flightlines.
Steve is in Wisconsin like I am, so I knew turnaround time
would be good, and Steve and Tom often collaborate to work
out good packages for RV's. I knew they could make
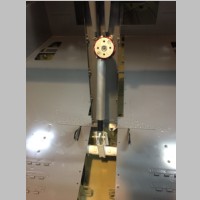
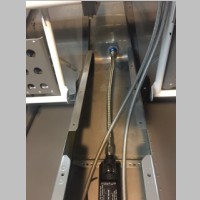
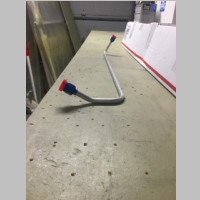
me the braided brake hoses I wanted. \ I also remembered from the RV-10 how much easier it was to work with flex fuel lines, so I wanted to do some of that on the RV-14 as well. First of all, the Van's supplied aluminum tube I found much harder to get good lines out of in my last build. I ran into one batch of tubing that wanted to crack and split a lot, so ordered another roll which wasn't as bad. But, the tubing is very soft and flexible which made it nick real easily with the tubing bender. I wanted to avoid all of that so I intended to use flex hoses which would be strong, last a lifetime, and perhaps route easier. What I found in the end is that flex teflon may not be the perfect thing in some areas of the RV-14. In the RV-14 you're probably better off going with hard lines for the side wall to fuel valve, and a Teflon hose, although it did work, was flexed in a tighter bend radius than I wanted when going from valve to fuel pump. So that was a good place for a hard line too. In regards to the tubing, the hard lines I felt would be acceptable if they were done in 5052-O. Steve has been working at getting a CNC bender all set up for making hard lines, so that would be a great project for him that would save me some time. The one line I did want flex was the line to the firewall from the fuel pump. This one would be real easy to make in solid tube, but the firewall in the RV-14 is very thin, and if there were ever any sort of landing incident, that line could easily be bent out of position and cracked, spraying fuel into the cabin. So I really wanted to go with a good stainless braided flex line to the firewall for that reason, keeping in mind that my daughters may be flying this plane. |
|||
 |
 |
 |
 |
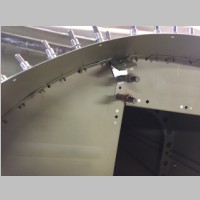
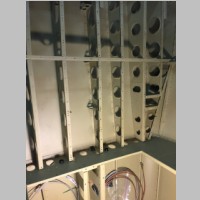
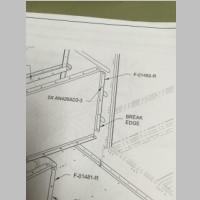
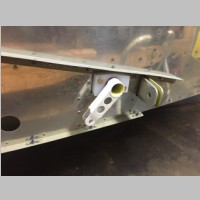
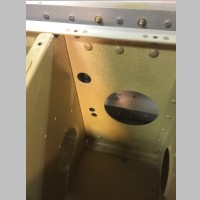
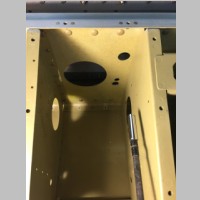
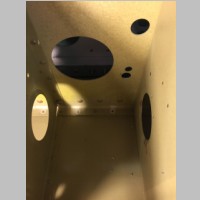
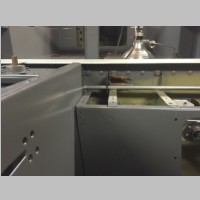
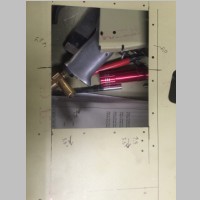
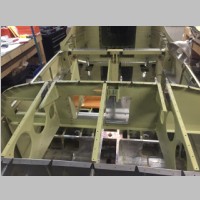
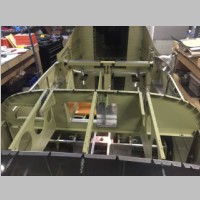
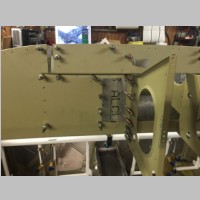
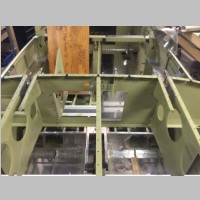
The first thing I had to do to switch to teflon brake lines was figure out where to route them. On the forward side, no big deal, but through the spar there were 2 .375" holes drilled per side, .5" center to center, and the plans had you run both hoses though the holes on the Right side of the plane. I'm sure this makes routing up the the wire chase to the panel area convenient. The problem is, the teflon hoses need .5" holes for the nuts that are preinstalled, whereas van's uses cheap compression fittings on plastic hose that can be cut and threaded through BEFORE the ends are put on. You can't drill those 2 holes to .5" because the holes will start to run together and leave no room for snap bushings. Without knowing the other things coming in the finishing kit, I had to take what I knew and make some educated guesses as to alternative ways to run the lines. I could drill more holes but I wanted to avoid that if possible. Also, those holes were in great places. It didn't appear that those holes on the left side of the plane would be used for wires, due to the other places I could see that were for running wires. It did appear that those could be for a pitot or static line, but those would be easily run through any of the 4 holes. So I decided that rather than run the brake lines only on the right side, and then cross one line under the center pushrods to the left of the plane, I'd use the bottom hole on each side, keeping the left hose on the left and the right on the right. This allows you to drill the holes out to .5" and preserve 2 other holes as .375" as before. I may end up having to route my static or pitot lines on the upper hole on either side if that's what is coming, but I'm kind of guessing that nothing will run though those holes anyway. Certainly nothing major and non-changeable like flight controls. |
|||
 |
 |
 |
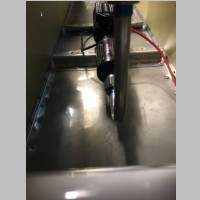 |
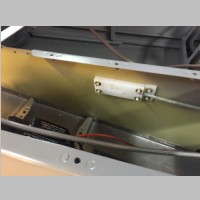
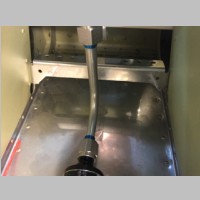
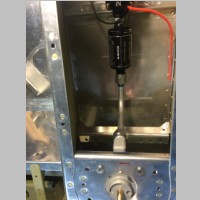
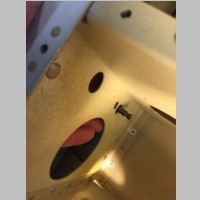
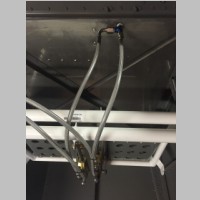
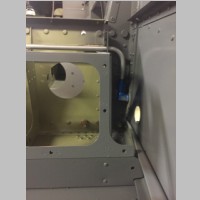
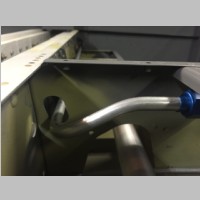
Some of the pictures above showthe holes in question. Above are also photos of the flex lines, and one of the prototype lines from valve to fuel filter. Steve made that line fit perfectly the first time...I was very impressed. You'll notice that when I enlarged the holes for the brake lines, I was able to do it with a hex shaft unibit and hex drill extension. This allowed me to drill a 1/2" hole and then pass the bit through the spar to the gap between front and rear half of the spar, and continue drilling. I used a right angle drill to enlarge the holes out to the side walls through the seat ribs. |
|||
 |
 |
 |
 |
 |
 |
 |
 |
 |
 |
 |
 |
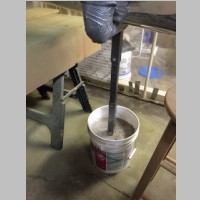
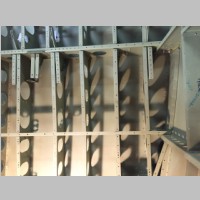
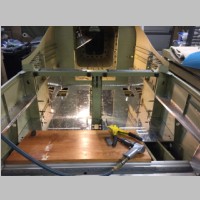
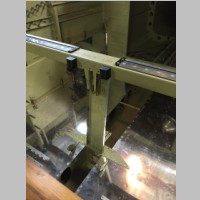
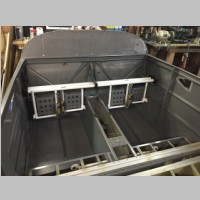
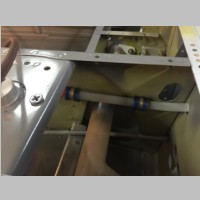
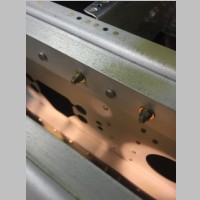
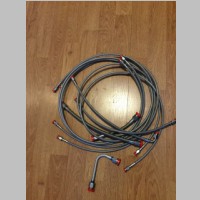
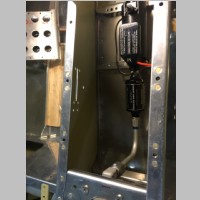
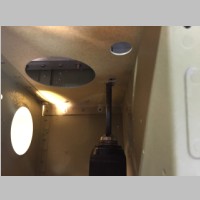
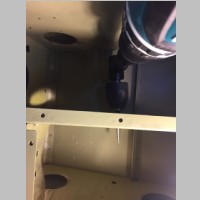
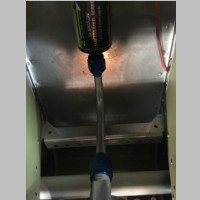
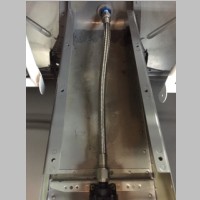
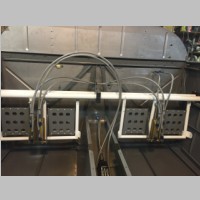
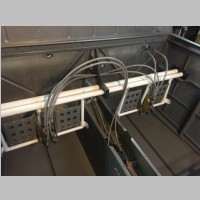
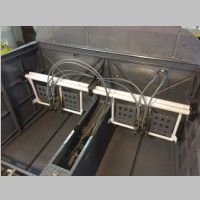
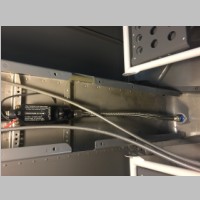
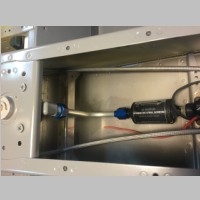
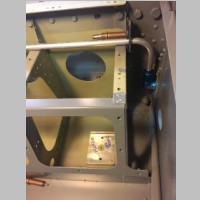
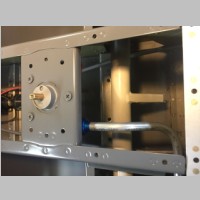
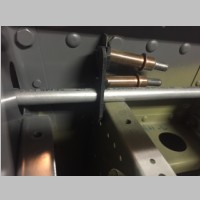
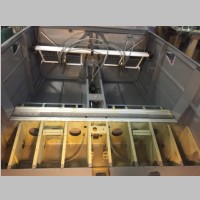
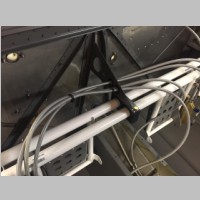
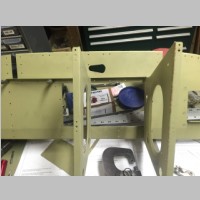
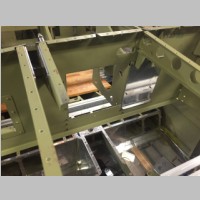
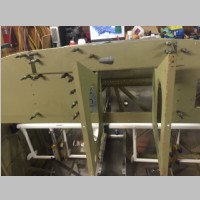
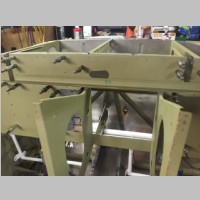
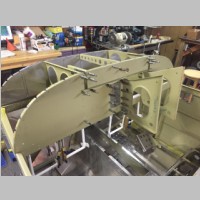
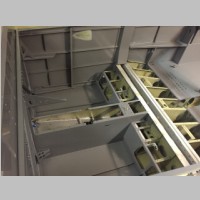
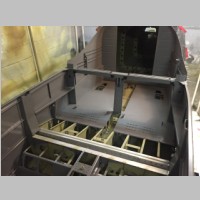
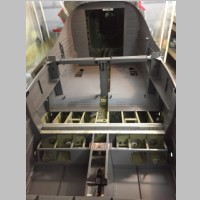
As I got the final fit brake and fuel hoses, I took some good pictures of them. Above are the hoses to the firewall. A 90 degree fitting was used on one of the hoses to give a nicer route with it's straight hose-mate down to the rudder pedals. The 2nd photo shows the final valve to fuel pump hose that also fit perfectly. The 3rd photo shows the flex line to the firewall. And the other photos above and below show the brake lines and routing. it's a nice clean package. The -3 sized brake lines are only about .275" or so, so not much larger than the .25" plastic. |
|||
 |
 |
 |
 |
 |
 |
 |
 |
 |
 |
 |
 |
 |
 |
 |
 |
 |
 |
 |
 |
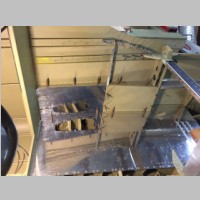
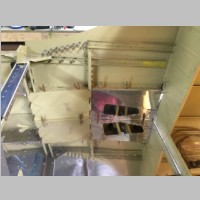
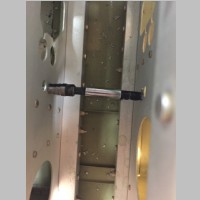
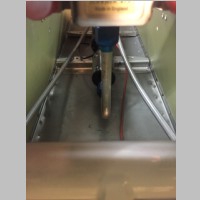
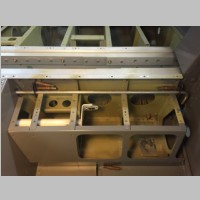
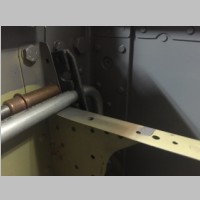
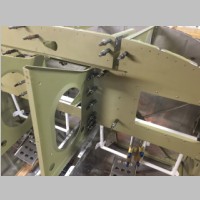
Above are lots more pictures of the brake and fuel lines. The above line is the fuel valve to side wall line that was bent in 5052-O by Aircraft Specialty. It also fit perfectly the first time and fit right in the Van's provided plastic fuel line standoffs. The photos 2 rows below show the brake hose package again. One thing to make note of...I drilled a 2nd hole though the center rudder pedal brace, to fit a second SB750 snap bushing for the brake lines. Those snap bushings have to get slit, as do the SB500-6 bushings that you have to use in the .5" holes to the aft portion of the plane. (Mine is a nosewheel plane) So altogether it requires the hoses, -3 elbows and a -3 Tee fitting, and some new snap bushings for routing the hoses. It is well worth the effort. It took me only about 5-10 minutes to enlarge all of the required holes and I had the whole brake line package installed within about 45 minutes. |
|||
 |
 |
 |
 |
 |
 |
||
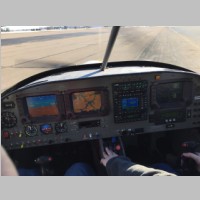
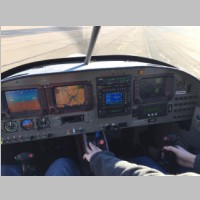
RV14 Panel Part 1
 |
 |
 |
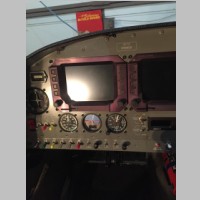 |
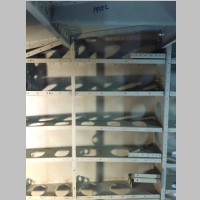
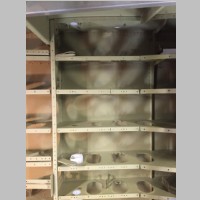
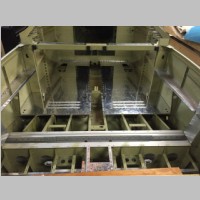
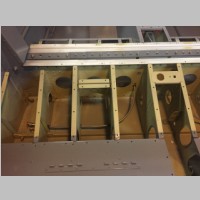
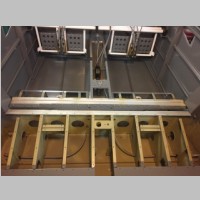
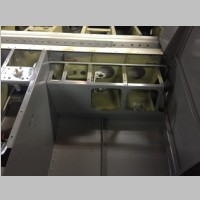
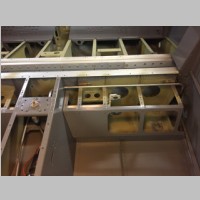
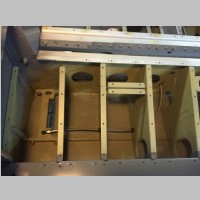
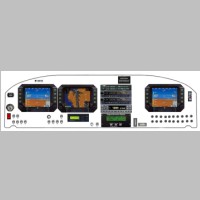
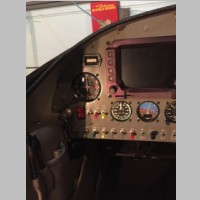
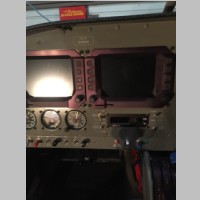
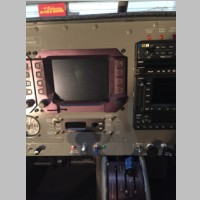
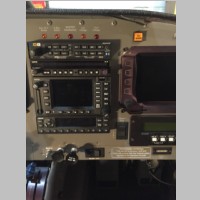
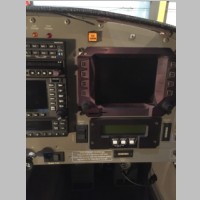
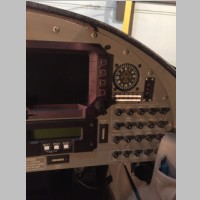
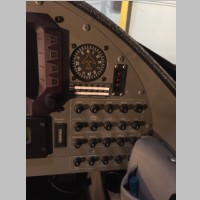
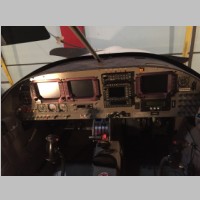
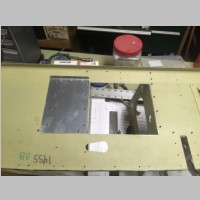
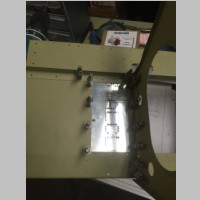
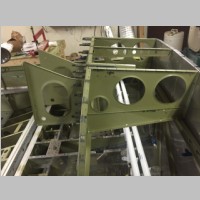
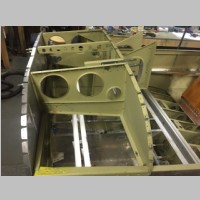
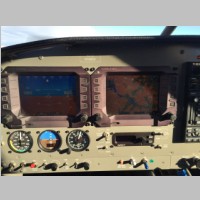
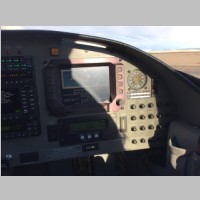
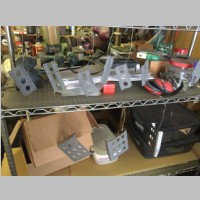
One thing I really wanted to do with the RV-14 is have close to the same panel layout as I do in my RV-10. I am not putting in another NAV/COM/GPS this time around, but I wanted the same switch layout, the same screen and autopilot locations, and everything to be as similar as possible. The reasons were twofold. #1, I love my panel layout in the RV-10 and think it's about ideal. #2, I want my girls to be able to jump in either plane and feel at home. So with that in mind, I got to work on the layout. I took close measurements of the panel backing strip that comes with the fuselage and the panel gets screwed into, and drew it up on the PC. I knew I didn't want to cut into that frame, and all avionics would have to fit inside that frame, so I set up a layout that would move the center stack over exactly 3.3" to the right, which was what I calculated it would take to give enough room to get the Left 2 Chelton screens at the right height and position. This also made it easy to place the 3rd screen. The only complications were that I'd have to move the center stack and worry about the canopy jettison quick release. The panel is one area where I'm not real happy with how pre-planned the kit is. Van's approaches it in a way that makes it quick and easy for the builder, *IF* they purchase what they plan for avionics. In my case, I'd have been far happier with a sub panel that wasn't pre-cut for a radio stack, and left some flexibility. I can see why they do it, but it sure makes things harder for me. I am also still curious about wether or not they will be adding a throttle quadrant option, but I'm rapidly approaching the point where I'm just going to have to do it myself. |
|||
 |
 |
 |
 |
 |
 |
 |
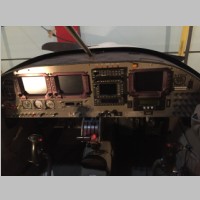 |
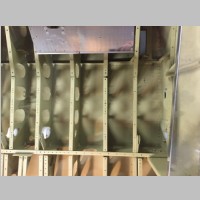
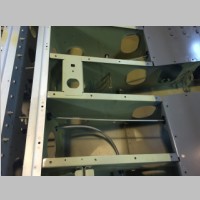
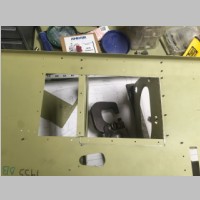
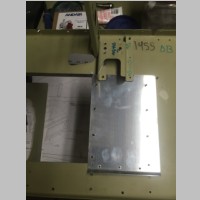
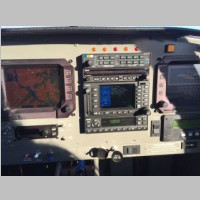
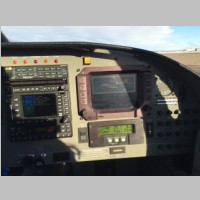
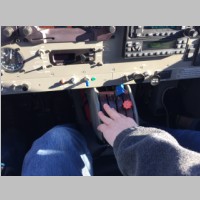
The pictures above are mainly for my own reference as I go forward, so I can refer to what my RV-10 panel looks like. Below I start hacking away at the sub panel. First of all, I knew I wanted to move the radio stack over 3.3", so I drew that out and prepared to cut. I also know the heights of all of my radios and things I want in the stack. I have one place where I may still have to make adjustments later and that is the canopy jettison handle, but they didn't include enough in the fuselage kit to get that all figured out. What I do know is, I will need to have at least .5" more in radio stack height to fit the radios I want. So I cut that up higher as well. This is going to require some of the cross bracing to be modified, which I have got everything I need for but haven't started it yet and it isn't shown in this update. Once I had that stack hole moved over, that means that the ribs to the panel frame don't have all of the holes left to rivet the ribs in place. This required me to fill the hole where the subpanel was moved from, and shim under the rib. The panel patch I used heavier aluminum sheet, bent on one end for stiffening, and I'll use some aluminum angle to reinforce it as well. I also ahve to modify the patch yet to accommodate the quick release mounting bracket. But, in one evening I was able to get that hole moved over and have something at least partially ready to move along with. I'll provide no more comments in this section for now, as it's vastly unfinished, but it won't be long and I'll be finishing up the panel and probably having the panel face cut. |
|||
 |
 |
 |
 |
 |
 |
 |
 |
 |
 |
 |
 |
 |
 |
 |
 |
 |
 |
 |
 |
 |
 |
 |
 |
 |
 |
 |
 |
Interior Paint
 |
 |
 |
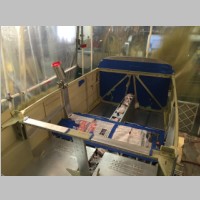 |
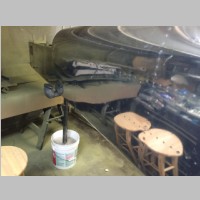
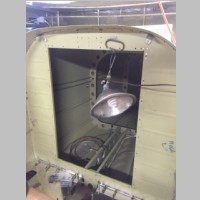
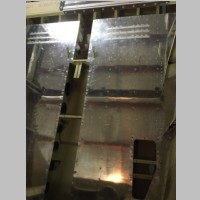
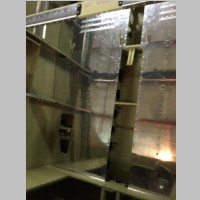
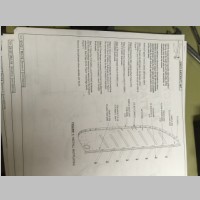
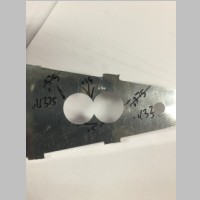
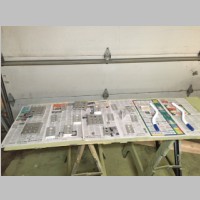
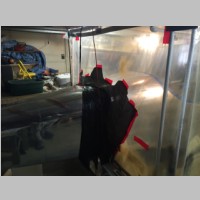
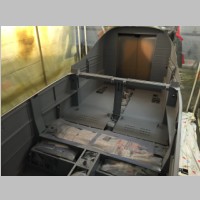
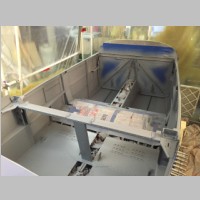
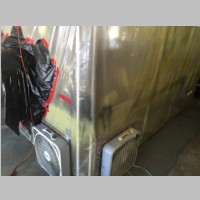
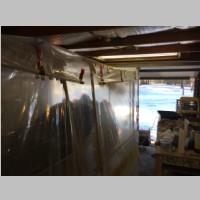
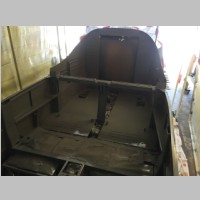
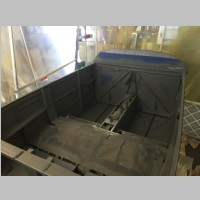
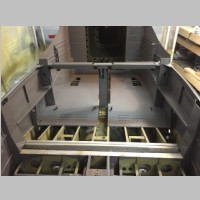
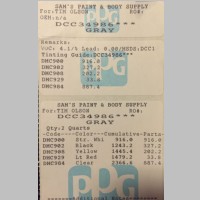
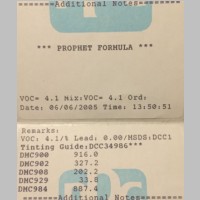
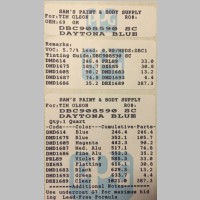
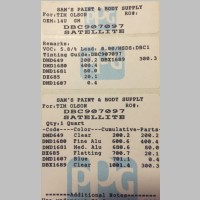
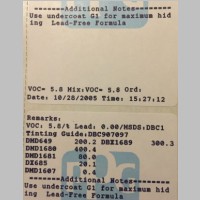
I don't have to go into a lot of detail with this section, because when I looked back at my RV-10 interior painting write-up I said basically everything that needed to be said. Funny that this was 9.5 years ago already! This time around I had the benefit of having a paint booth, which we quickly modified to slip over the tail and enclose the main center fuselage. It didn't leave a lot of walking room around it, but it worked out ok for me. I did a quick tape-off of the areas I didn't want to paint, and degreased it all, and then started spraying primer. This time I didn't use any etch primer, as much of it was primed with Akzo already. But when I do, I think I will use this one...JP215 Etch Primer. On my RV-10, everything was painted with PPG Concept. That paint is now up to $400/gallon or so. So I will switch to shop line products for the etch primer, and I even used this Shop-Line JP37x series Epoxy primer for the interior. Had I planned this ahead of time, I probably wouldn't have used Akzo on so many areas, but, I still needed to prime between parts, so that's ok. The Akzo is also the toughest primer I've ever seen, so I'm glad it's there. For this interior paint though, I just scuffed the Akzo and bare aluminum and used the grey JP37X series epoxy and soon I had a nicely greyed interior ready for paint. Oh, and regarding what to paint and what not to paint... I decided to paint most of it except the stainless firewall and here's why: You probably want to prime anyway, just to give corrosion protection under the vinyl/leather/cloth panels that you amy add. But, the Akzo wasn't smooth and wouldn't be as good for gluing and taping things to, whereas paint would be much smoother. Also, it takes time and effort to tape everything off and without knowing exactly what would be visible, it was easier to just paint all of it. This means all the side panels will stick well everywere, and wherever there is metal exposed, it'll be painted. Regarding the actual paint choice, I had intended to use the exact same paint and colors as my RV-10 until I heard some new advice. Bob, the guy who helped me paint the RV-10, suggested Delfleet FDG Single Stage Poly by PPG, since PPG Concept was so expensive. He said it's got awesome shine to it, and is very good paint. I did a bunch of googling and found out he's right, and many people even use it on airplanes. It also is supposed to cover rivets real well. So Delfleet it was! For the interior on the RV-10, I added DX685 to flatten the paint. Delfleet works differently in that rather than add flattner, you just cut back on the gloss providers a bit. So I used the same paint code as the RV-10 and had them mix it up in a gloss level between semi-gloss and eggshell. I almost wish I would have just went eggshell. The reason is, you really don't want anything shiny in the cockpit...it will glare off the windows and make photos turn out bad. But, after painting, I found the Delfleet FDG was almost the exact same color as a piece of metal off the RV-10 interior so I was very happy with the result. I now plan to paint the white in a similar white as the RV-10, but use Delfleet FDG. I put photos of my RV-10 paint mix formulas below, for my future reference as I paint. The blue and silver aren't able to be done in FDG, so I will either come up with a similar single stage version, or I will just do the base/clear and use those exact colors. I'm not sure yet. But, I do want them to be almost identical so I'll see what happens. The actual spraying went exactly as the RV-10. Again I didn't keep the dust off the floors well enough, so I have a little bit of embedded dust, but it's all in areas that will be covered by carpet. The sidewalls came out real well. I did find that painting the interior is very much harder than doing exterior work, due to the angles you spray at, and what it takes to control the gun inside that confined area. So, I ended up with 5 places where I had runs...all areas that will be covered, and all areas that were hard to spray. |
|||
 |
 |
 |
 |
 |
 |
 |
 |
 |
 |
 |
 |
 |
 |
 |
 |
 |
 |
 |
 |
 |
 |
||
Previous | Site Home | Next