RV14 Fuel Tanks
Completed 11/2013Wow, now THAT took longer than I expected!
I say that tongue in cheek because I kind of got busy and sidetracked. Last year I bought a hangar, attached to my old hangar but facing the runways, and it was bigger. The only problem was the door....the door was crap. Period. It was a homemade, wood stud, flip-up door on garage rails that was ready to kill someone, and 2 of the 5 rails weren't even properly connected. It was not something I'd EVER put my plane in or under. So I ordered a door, and living in Wisconsin I didn't want to install it in the winter. I should add that I installed it myself. It's a Schweiss door, and I found it to be a project that you actually can do yourself. For photos of the install follow this link. So I scheduled it for a March delivery, figuring that it's ALWAYS warmer and the snow is almost gone in March. Well, not in 2013 it wasn't. 2013 turned out to be a hellish year for weather, and it caused everything to drag on and on. I took a break from building while I tended to the door project, and ended up working on that into June. Then came summer fun, Oshkosh, kids in Volleyball which was very schedule intense, and so on, until we finally arrived at mid-OCTOBER! Yes, I somehow managed to lose 6+ months of building time. It didn't help that when I stopped building, I had prepared all of the fuel tank parts, and the next steps were to proseal everything and put it together....those steps take focus and consistent time spent working on the kit, so it wasn't something I could just nibble at. I had to wait until I knew I could finish it, and ideally you really want at least 1 set of hands working with you, to keep the proseal mess to a minimum.
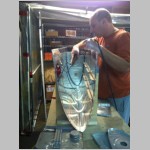
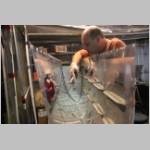
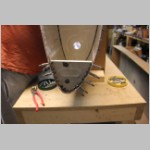
So in October I finally dug back in, determined to finish these tanks and get them behind me. Below are some pictures of the process. I did my tanks for the RV-10 basically the same way. See this Write-Up for that. If you read that though, there are a few things that I did differently.
First, on the RV-10 I guesstimated the proseal mix. For the RV-14 I purchased a very accurate mini scale, and some scale calibration weights. I found that yes, you can accurately measure 1 gram on these things. It was amazing. I shopped for one that had the proper resolution and precision for me, and it was cheap...under $20 I think. Using this, I mixed my proseal with accuracy I'd not had on the RV-10, and it worked well. I used paper plates (probably should have used waxed paper plates) to mix it on, and mixed it with a putty knife.
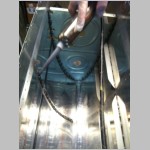
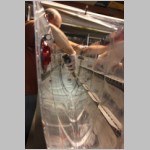
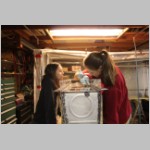
The other changes were in HOW I applied it. On the RV-10 I used wooden popsicle sticks. On the RV-14 I both used a 1" diameter cow medicine syringe (no needle) for the small jobs, and a borrowed Semco Proseal gun and used/empty cartridges. This was an amazing help and very nice tool. I used only the 3" tips on the semco cartridges, to minimize waste. You mix the stuff up, stuff it into the cartridge (just like loading a caulk cartridge from the back) and then insert the plastic plunger cap. The gun works by air pressure, pushing the plunger in, just like caulking, only run by air. A caulk gun would indeed work, but it would squirt fast when you squeeze, and then slow, and probably run-on after you squeeze. The Semco gun has a handheld lever action trigger like a die grinder, and allows you to very slowly or quickly squeeze out steady beads of proseal. It kept down the mess, and made the process much more fun and clean. You go through gloves while mixing, and any time you rivet or insert ribs, and then again for cleaning up. Thanks Ed for loaning me the gun, and John for getting me some used cartridges!!
I used clear vinly gloves for mixing and handling the tools, but when I needed things to keep clean, I used Medium duty Nitrile gloves from Harbor Freight, as I could wipe my gloved hands/tools with MEK or Toluene to clean things. Both chemicals can be nasty, and MEK does work, but if you have to choose, I'd choose Toluene I think. I believe it's a more compatible solvent for proseal. MEK may clean up a little better, however...but it is really bad for you. Use both with good ventilation.
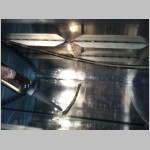
The biggest mess came with installing rivets or especially bucking them. There isn't much to do to avoid that except if I were doing it again, I'd probably put tape on the ribs and skins near the joint so that I could smear up on it and then yank the tape later and have it all be clean. I did proseal over the shop heads of the rivets, and instead of a dot over each one, I did the whole rib flange top. My reasoning was that if I did many dots, if they broke free they'd end up in the strainer. A long continuous piece would be both less likely to release, but if it did, it would tend to stay attached better. I did the same thing in the -10 and it seemed to be fine.
I was not very conservative with proseal....I'm sure I could have been FAR more conservative, but I used nearly 2 full cans to do the 2 tanks. On the RV-10 I did the same, or maybe even used a little less, and they were larger tanks. I did waste quite a bit on this build, over-mixing the amounts a couple times. But, the process and tools worked well.
With the tanks done, I'm now back being a bit more consistent in my build, and able to work on more simple things like ailerons/flaps and other wing items.
 |
 |
 |
 |
 |
 |
 |
 |
 |
 |
 |
 |
 |
 |
 |
 |
 |
 |
 |